Accounts - Dashboard Actions
Know actions you can perform in the accounts tab.
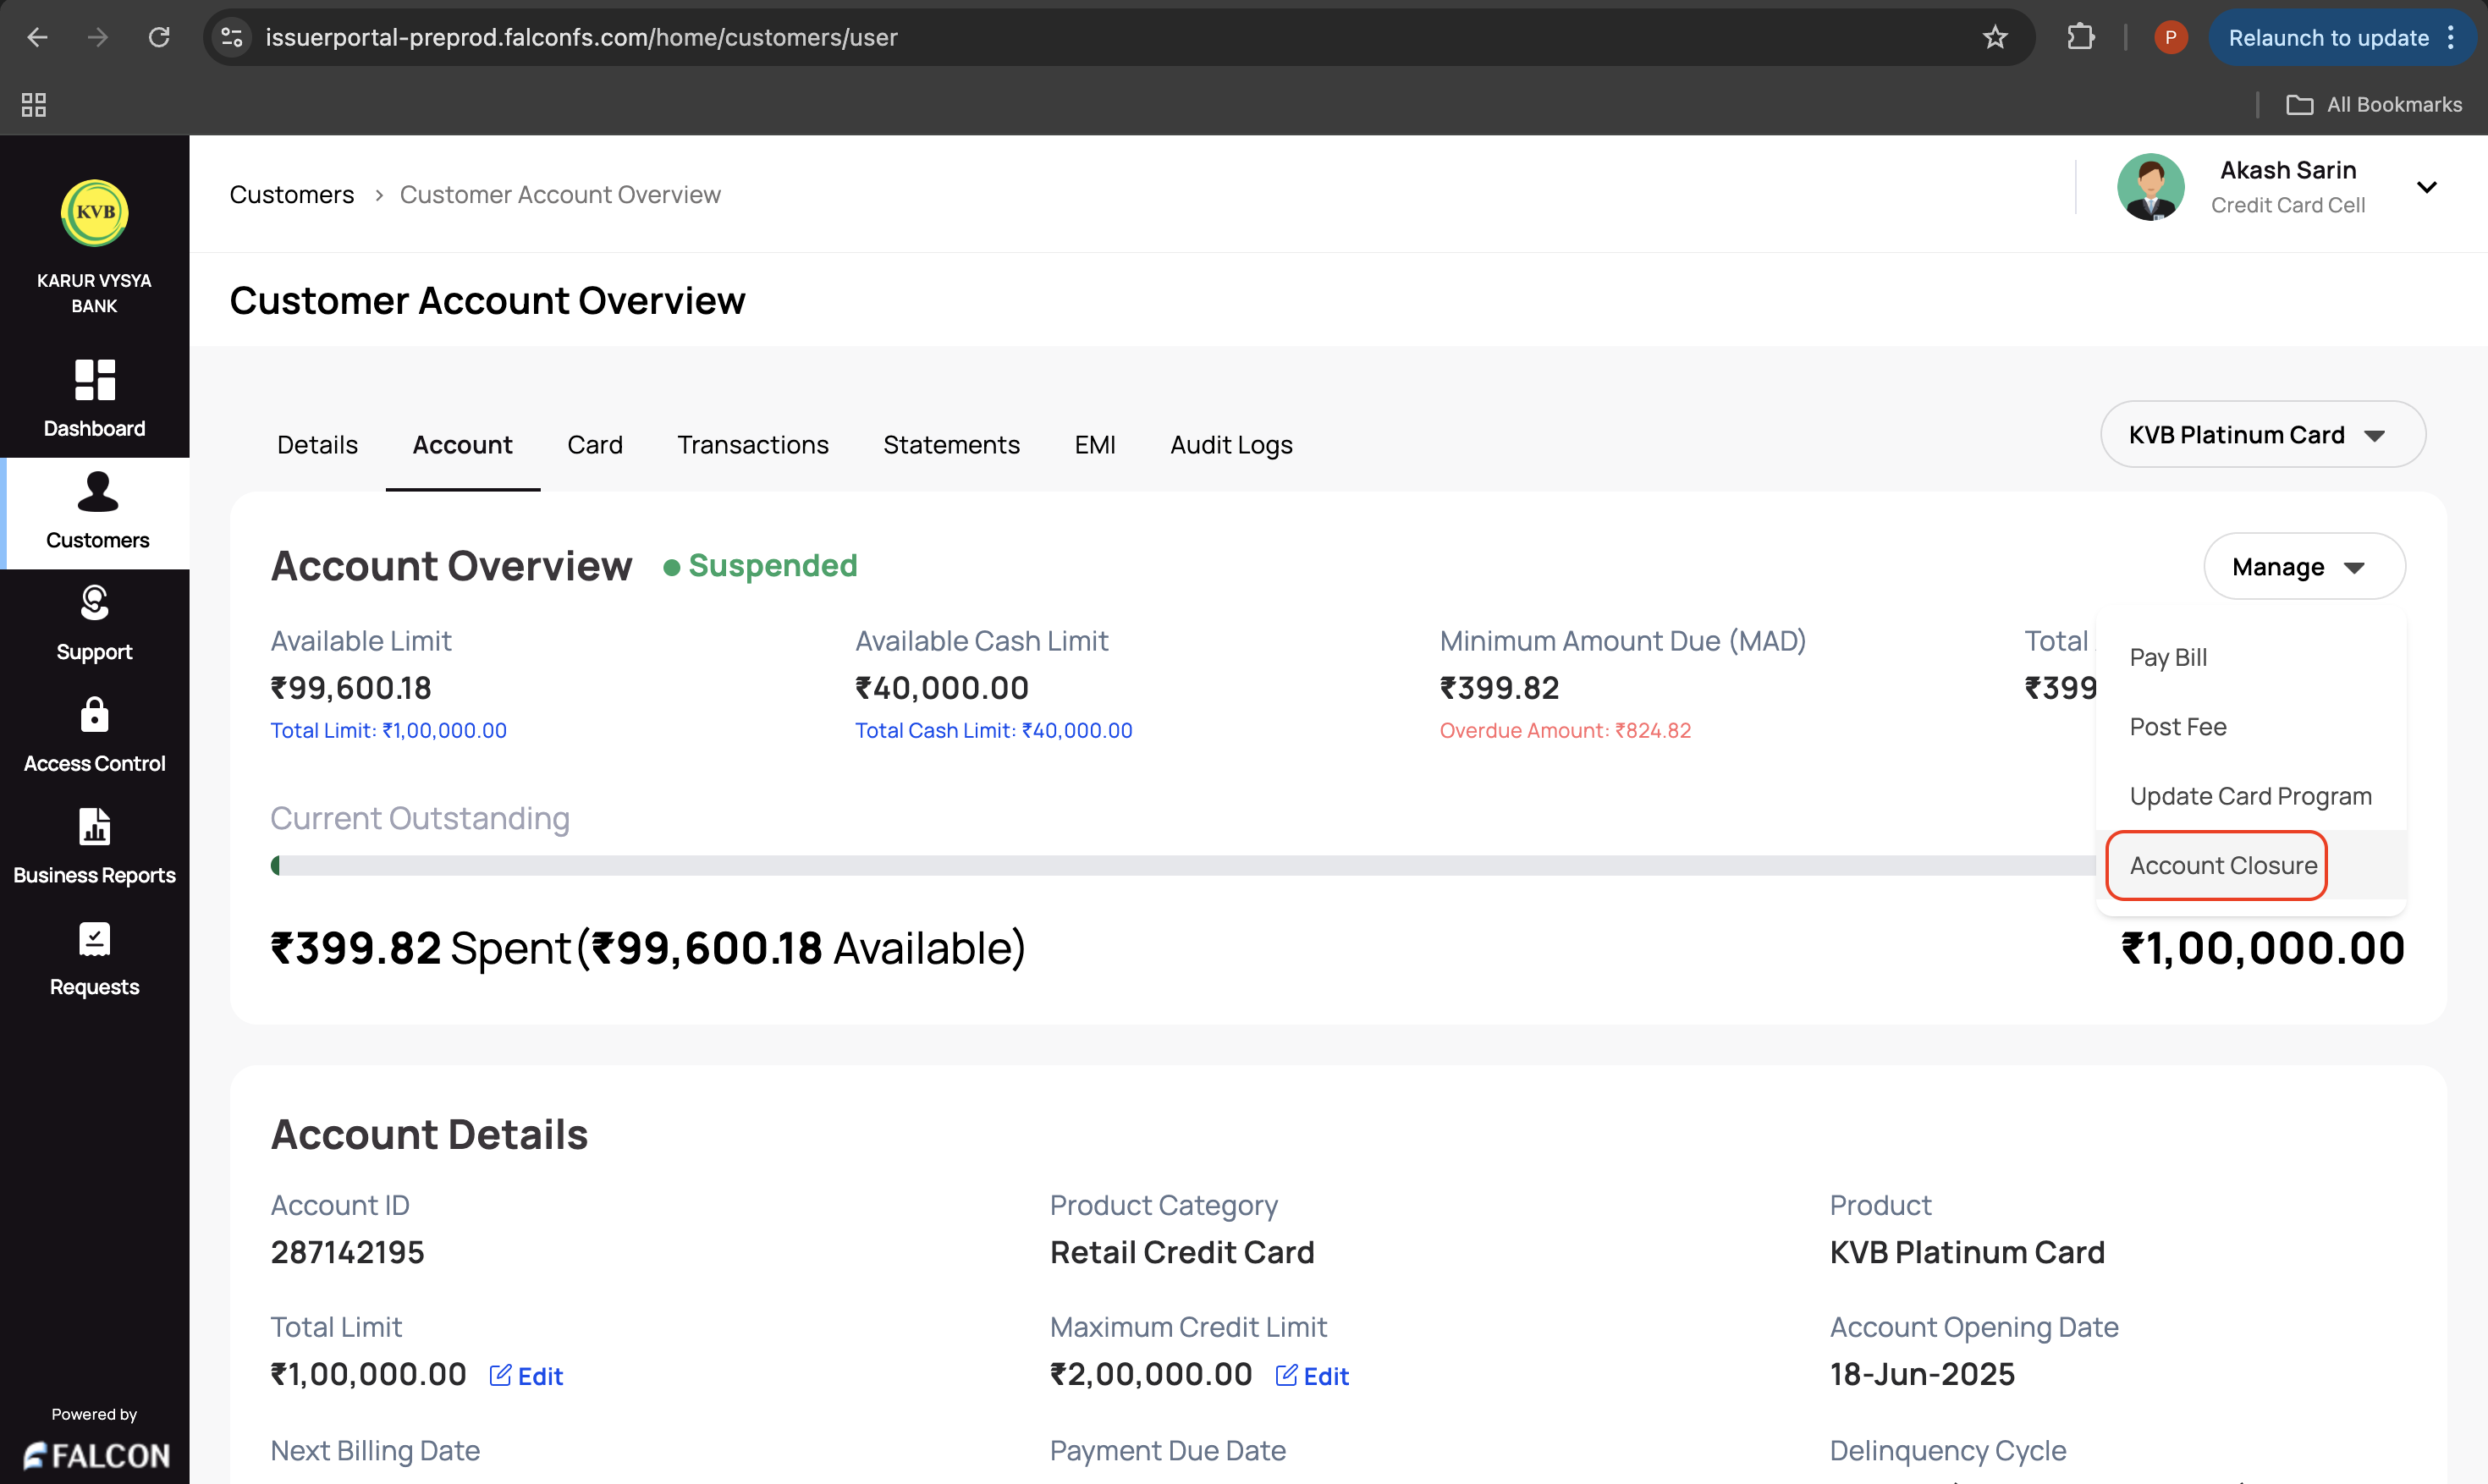
An admin and support maker can perform the following actions from the Accounts sub-page:
- Pay Bill
- Post Fee
- Update Card Program
- Account Closure
- Edit Total Limit
- Edit Maximum Credit Limit
- Update Payment Due Date
- Update/Configure Auto Debit
- Enable/Disable Auto Renewal
- View Transactions of a Card
💰 Pay Bill
This action is used when a bank should update a bill payment for a customer.
To pay the bill:
-
Log in to the issuer dashboard using the role-based credentials.
-
If a user is:
- An admin maker: Click the customer to pay the bill.
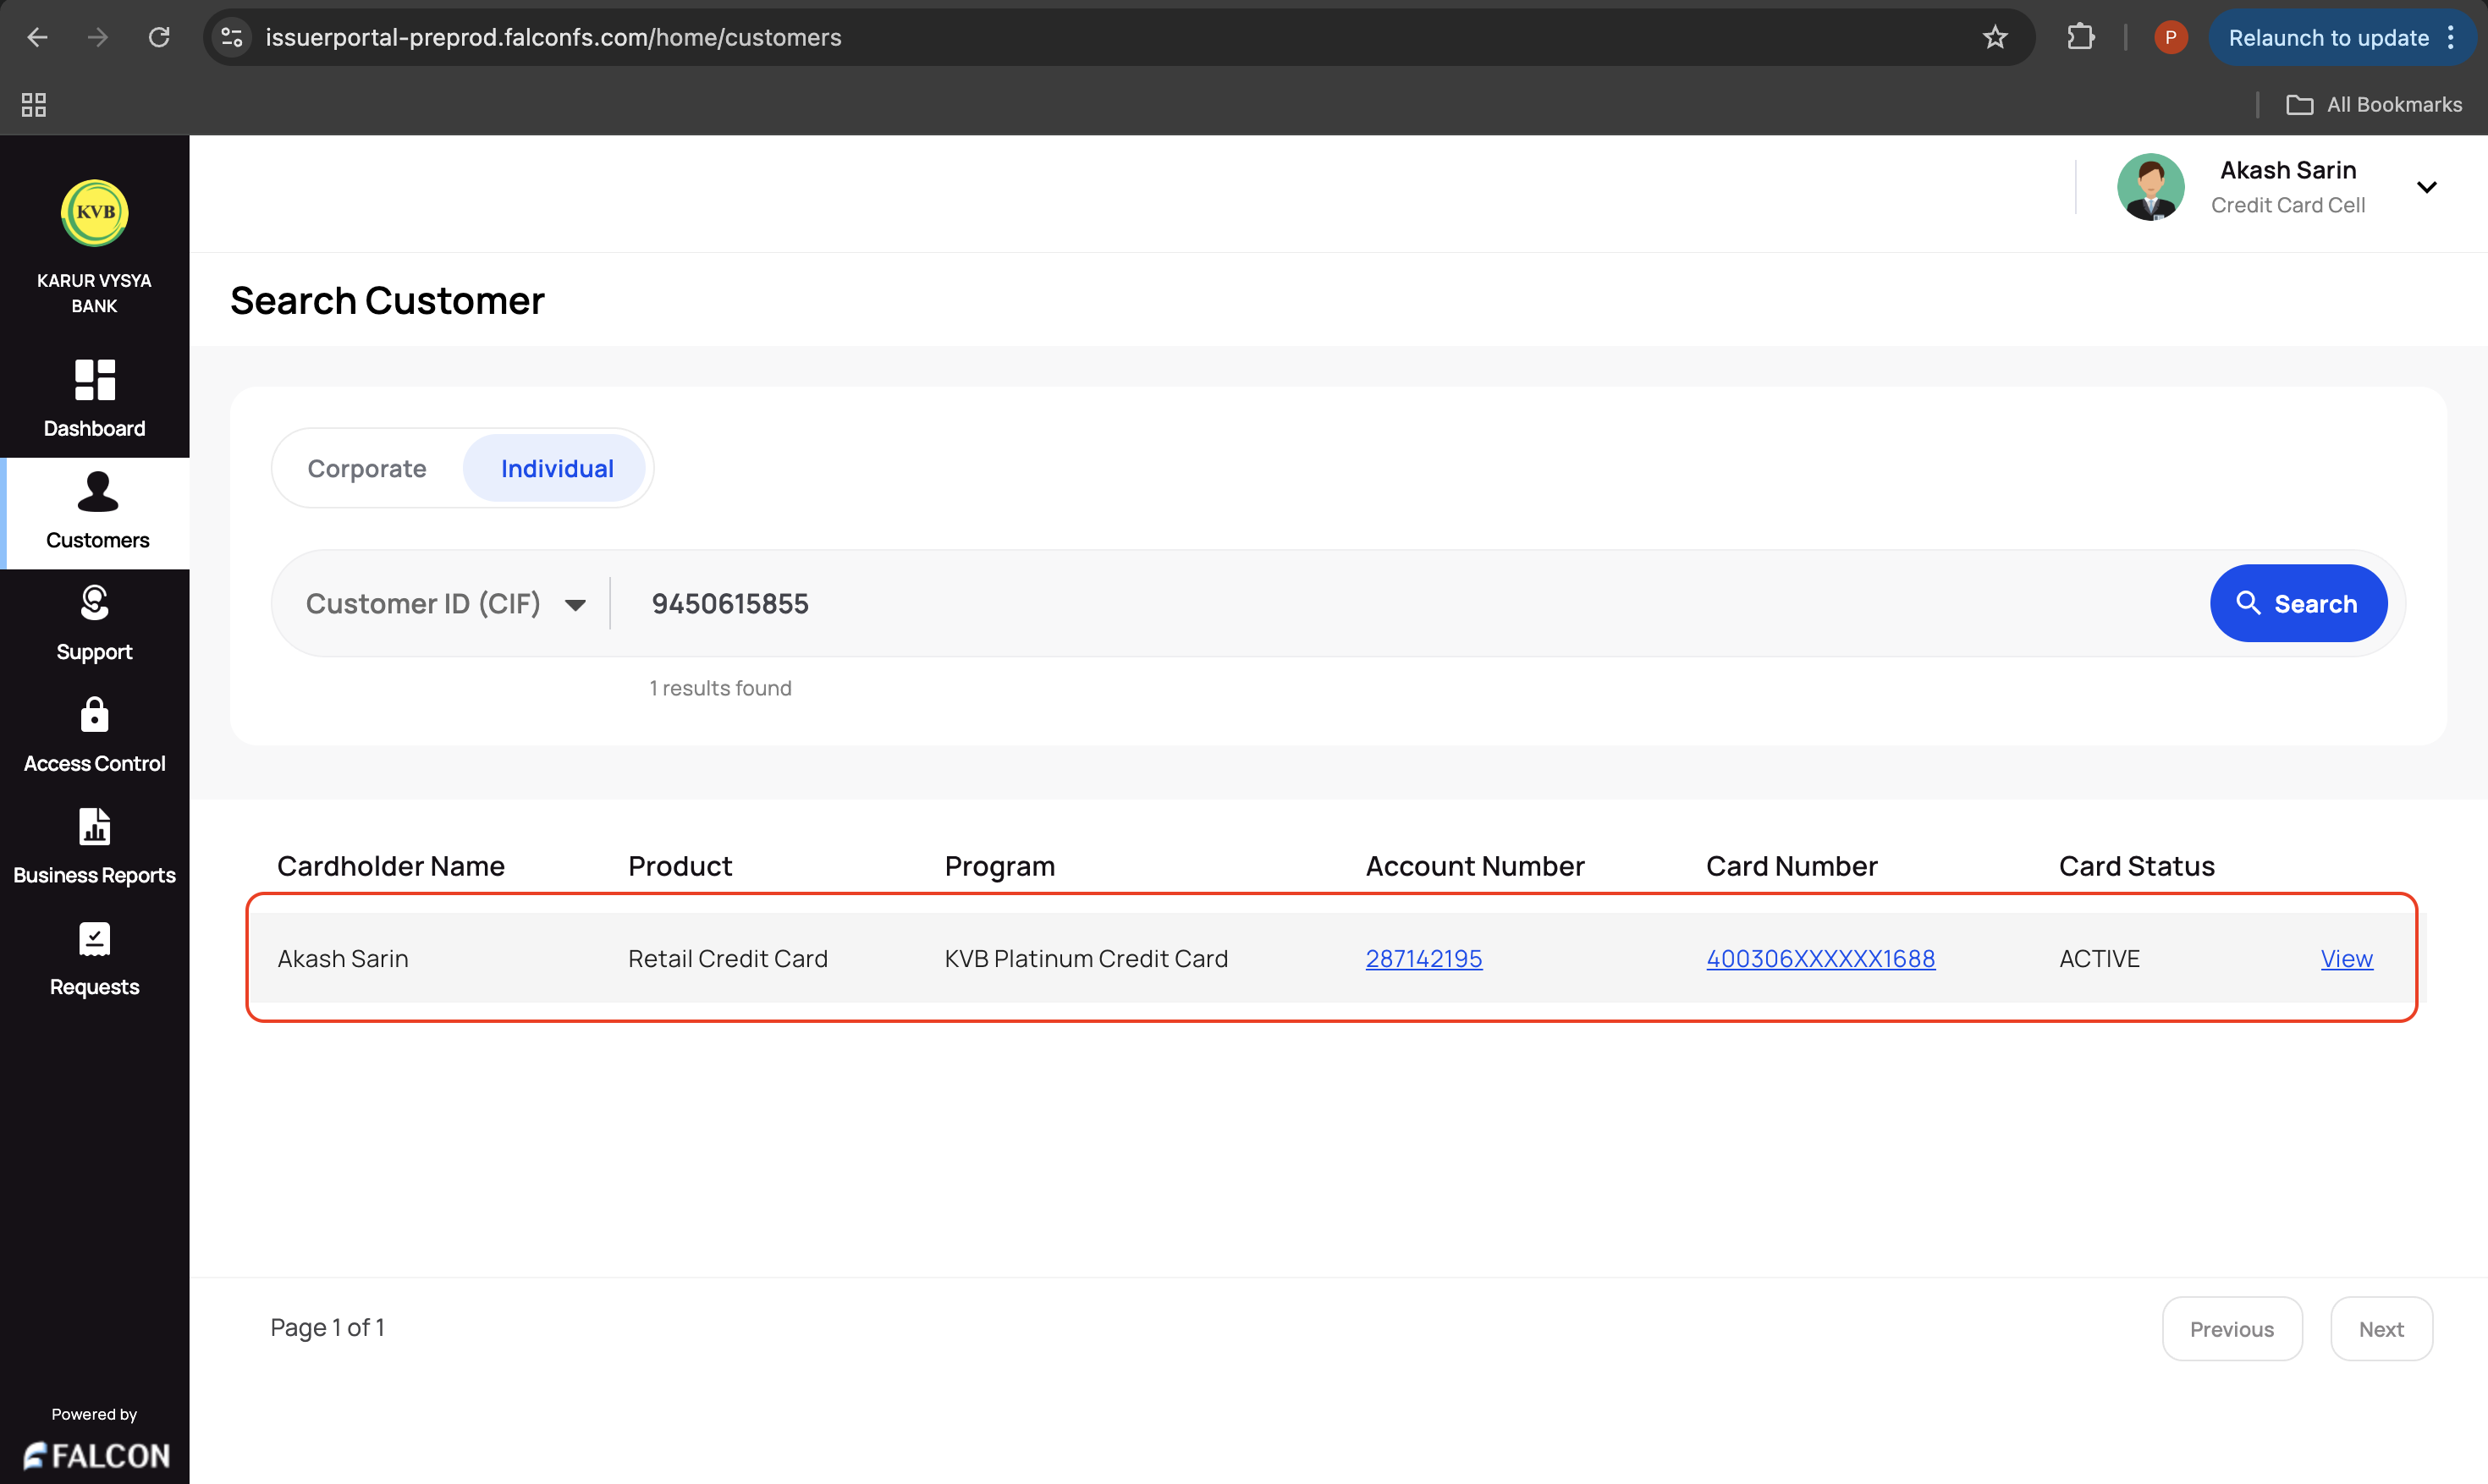
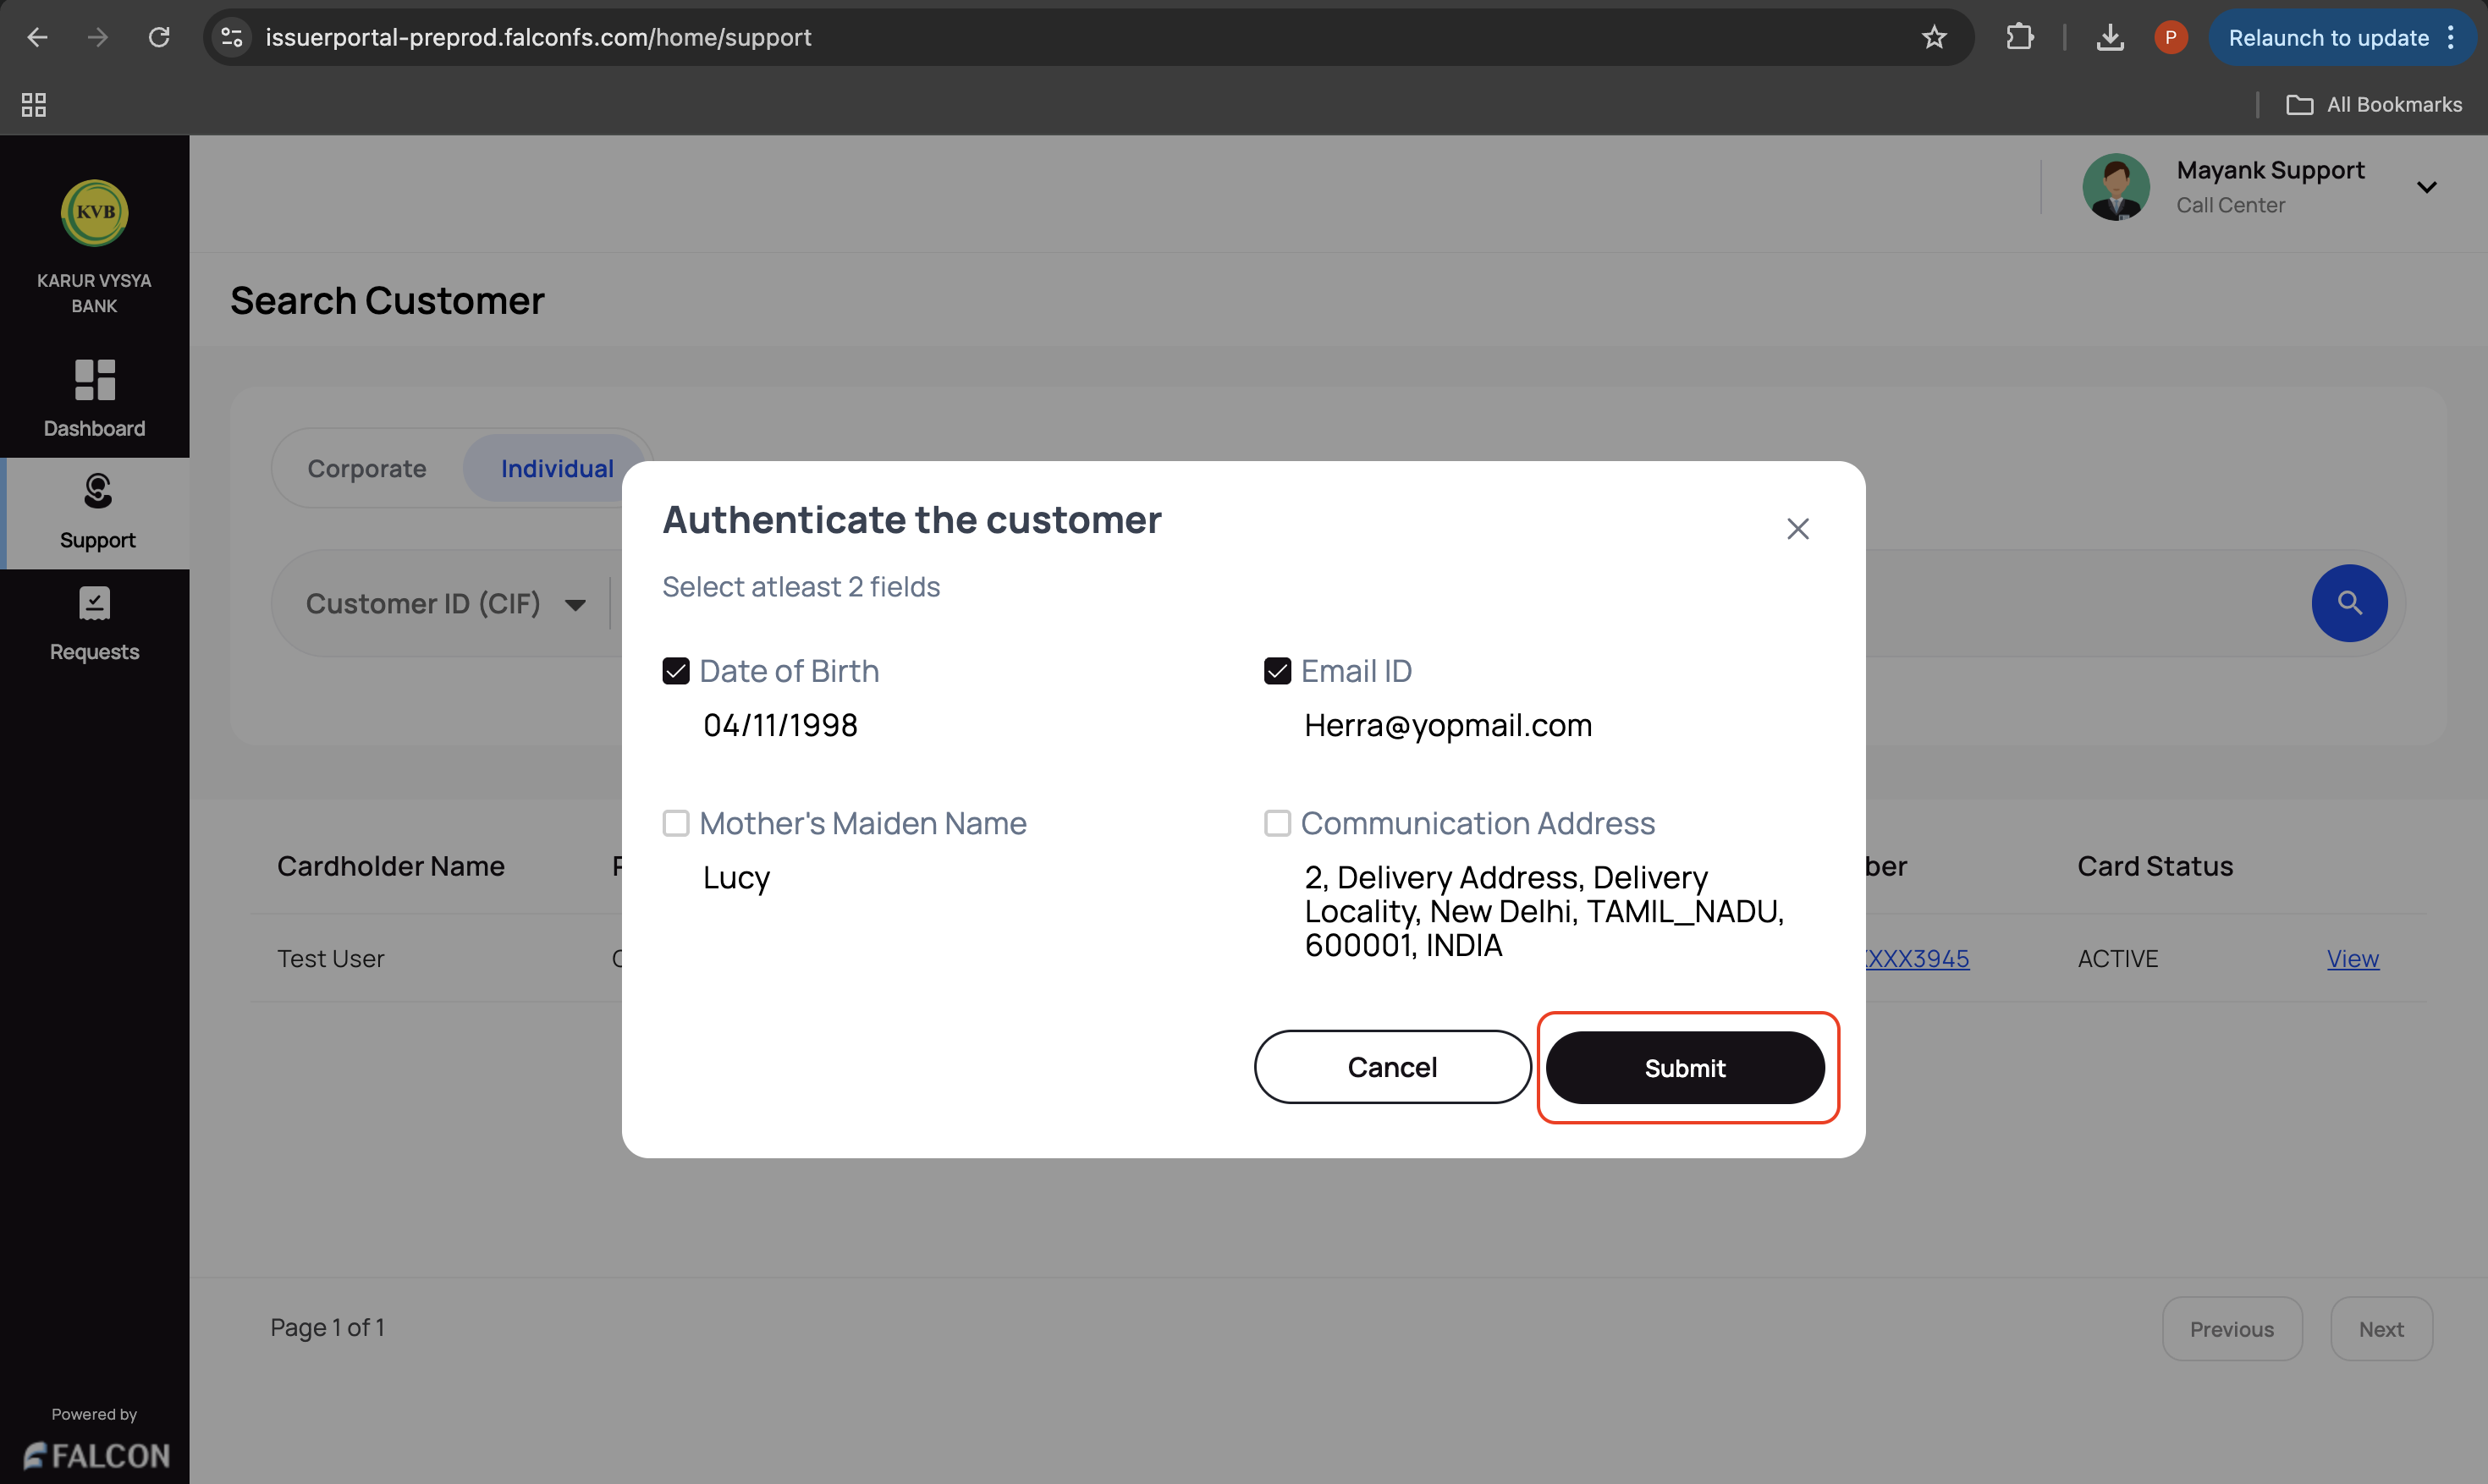
- A support maker: Click the customer, select any two customer details to authenticate, and click Submit.
-
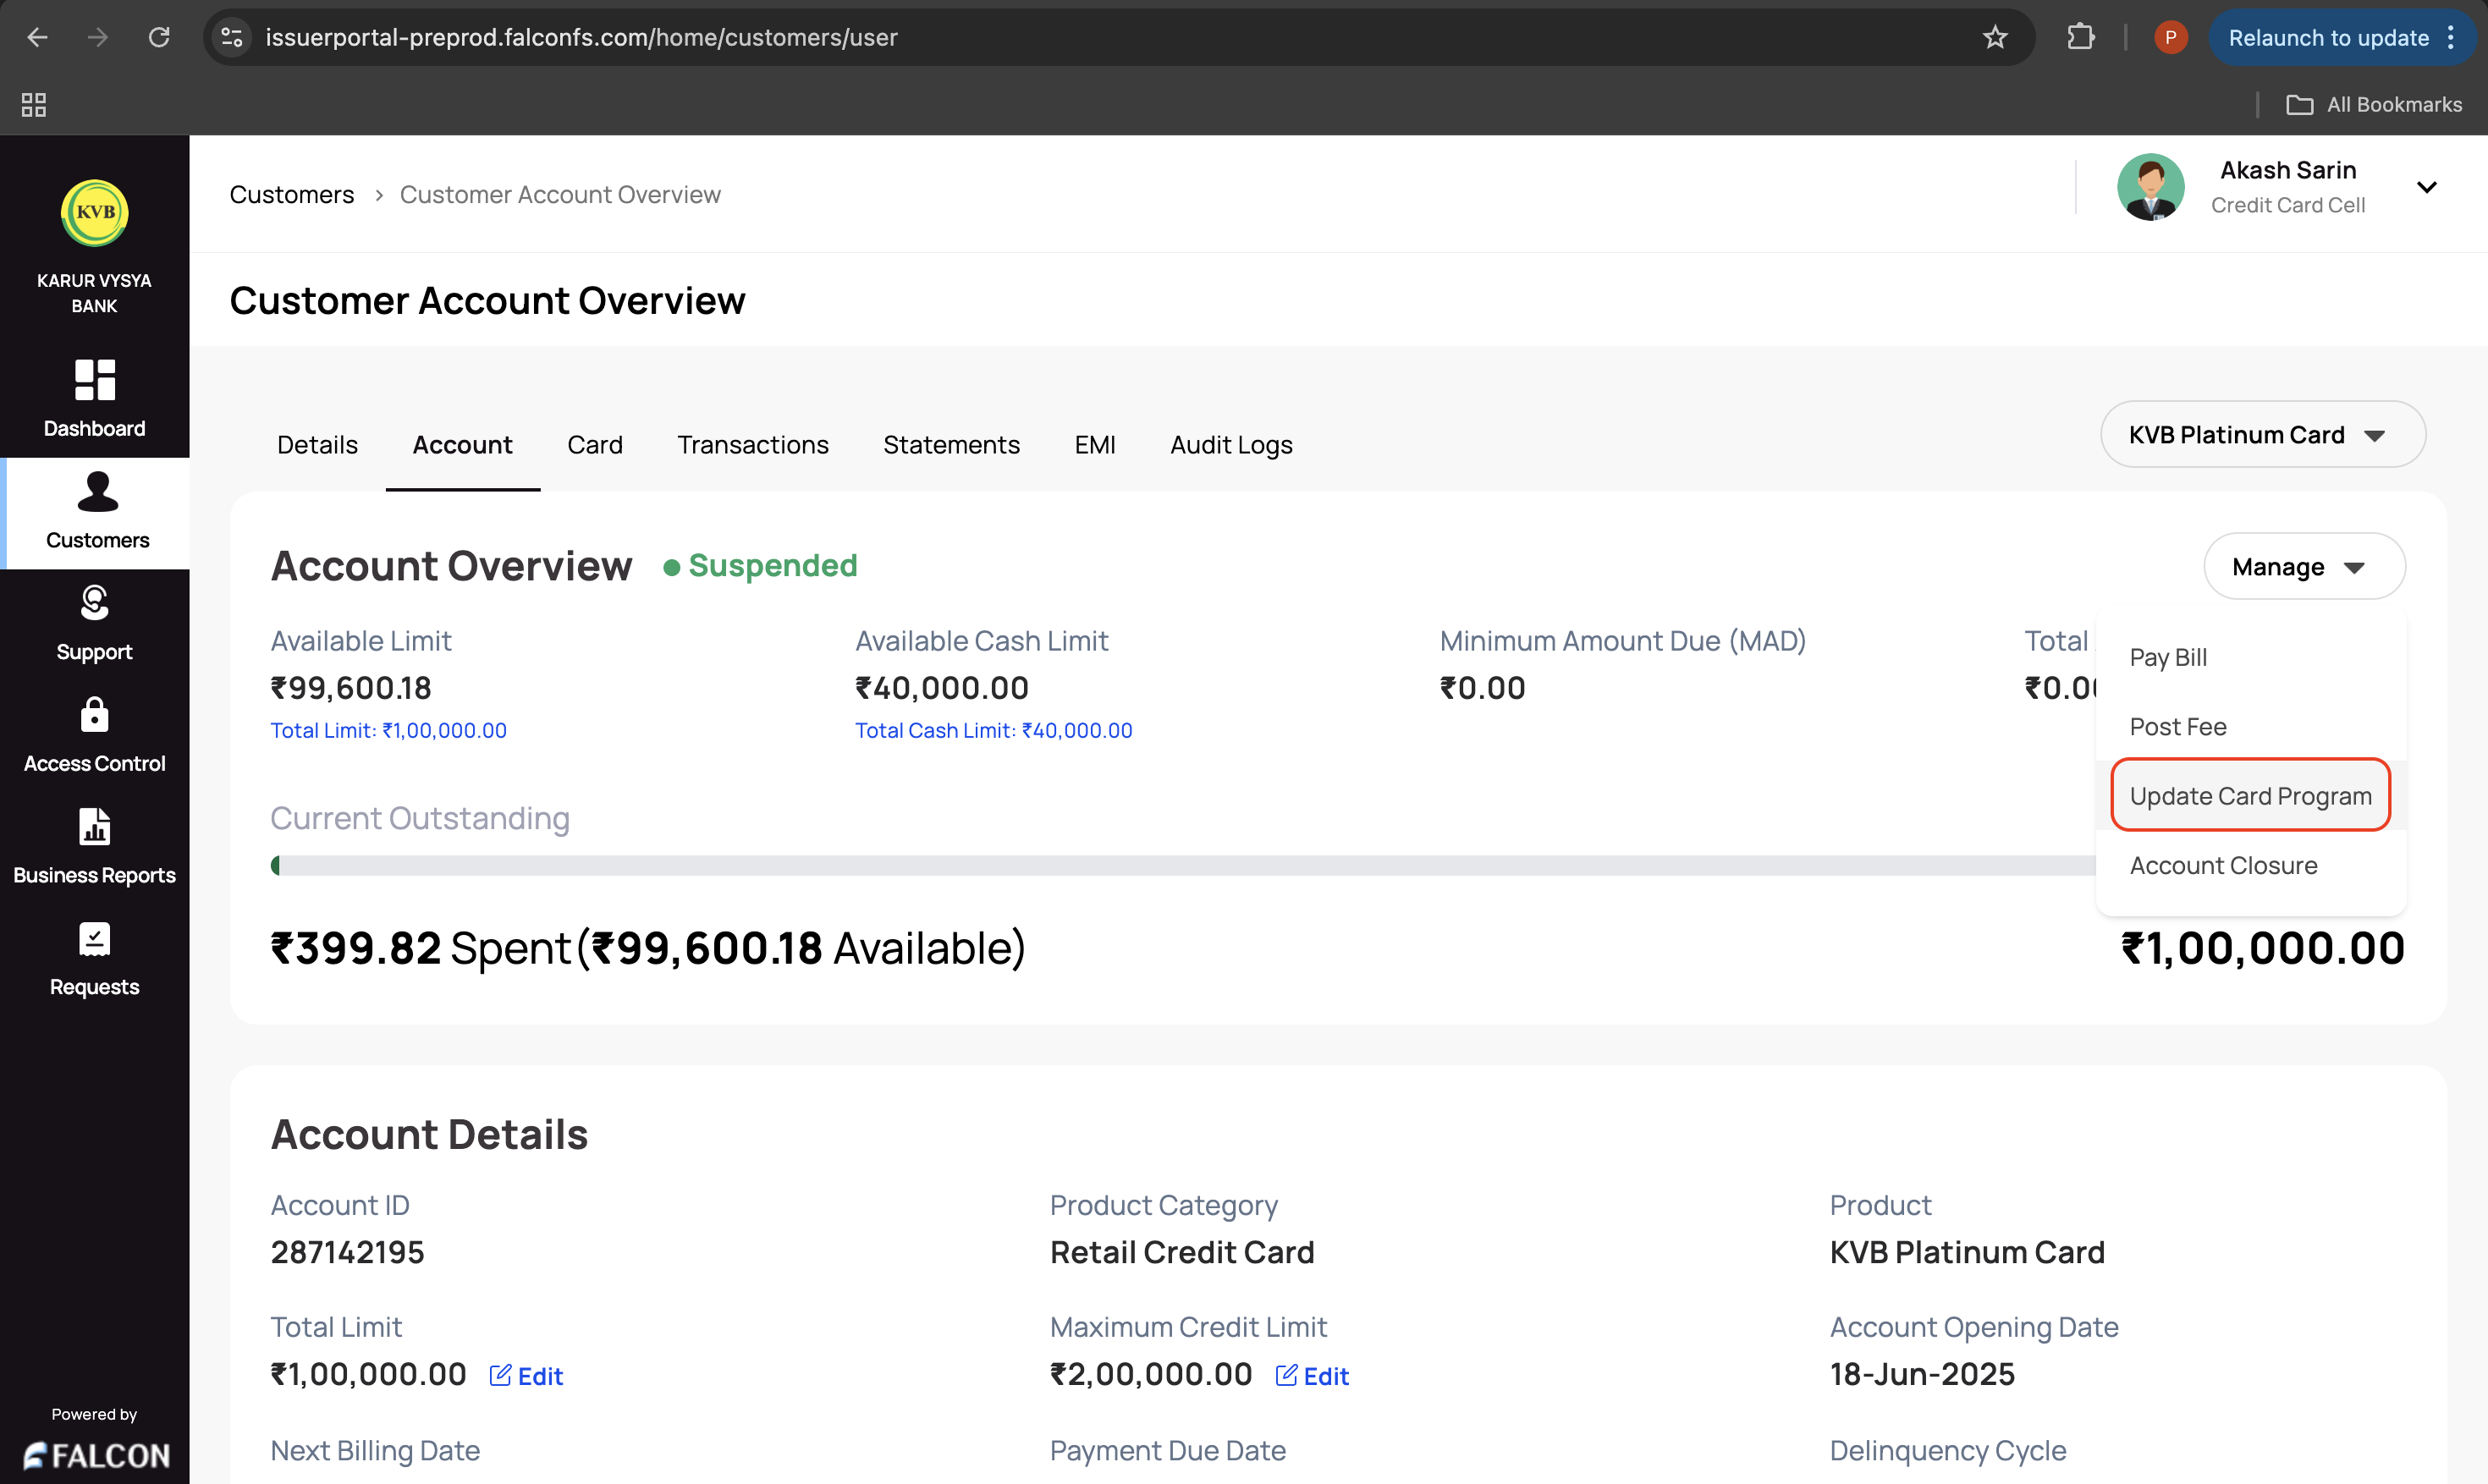
Go to the Account tab, click the Manage drop-down displayed in the top-right corner of the Account Overview section, and click Pay Bill.

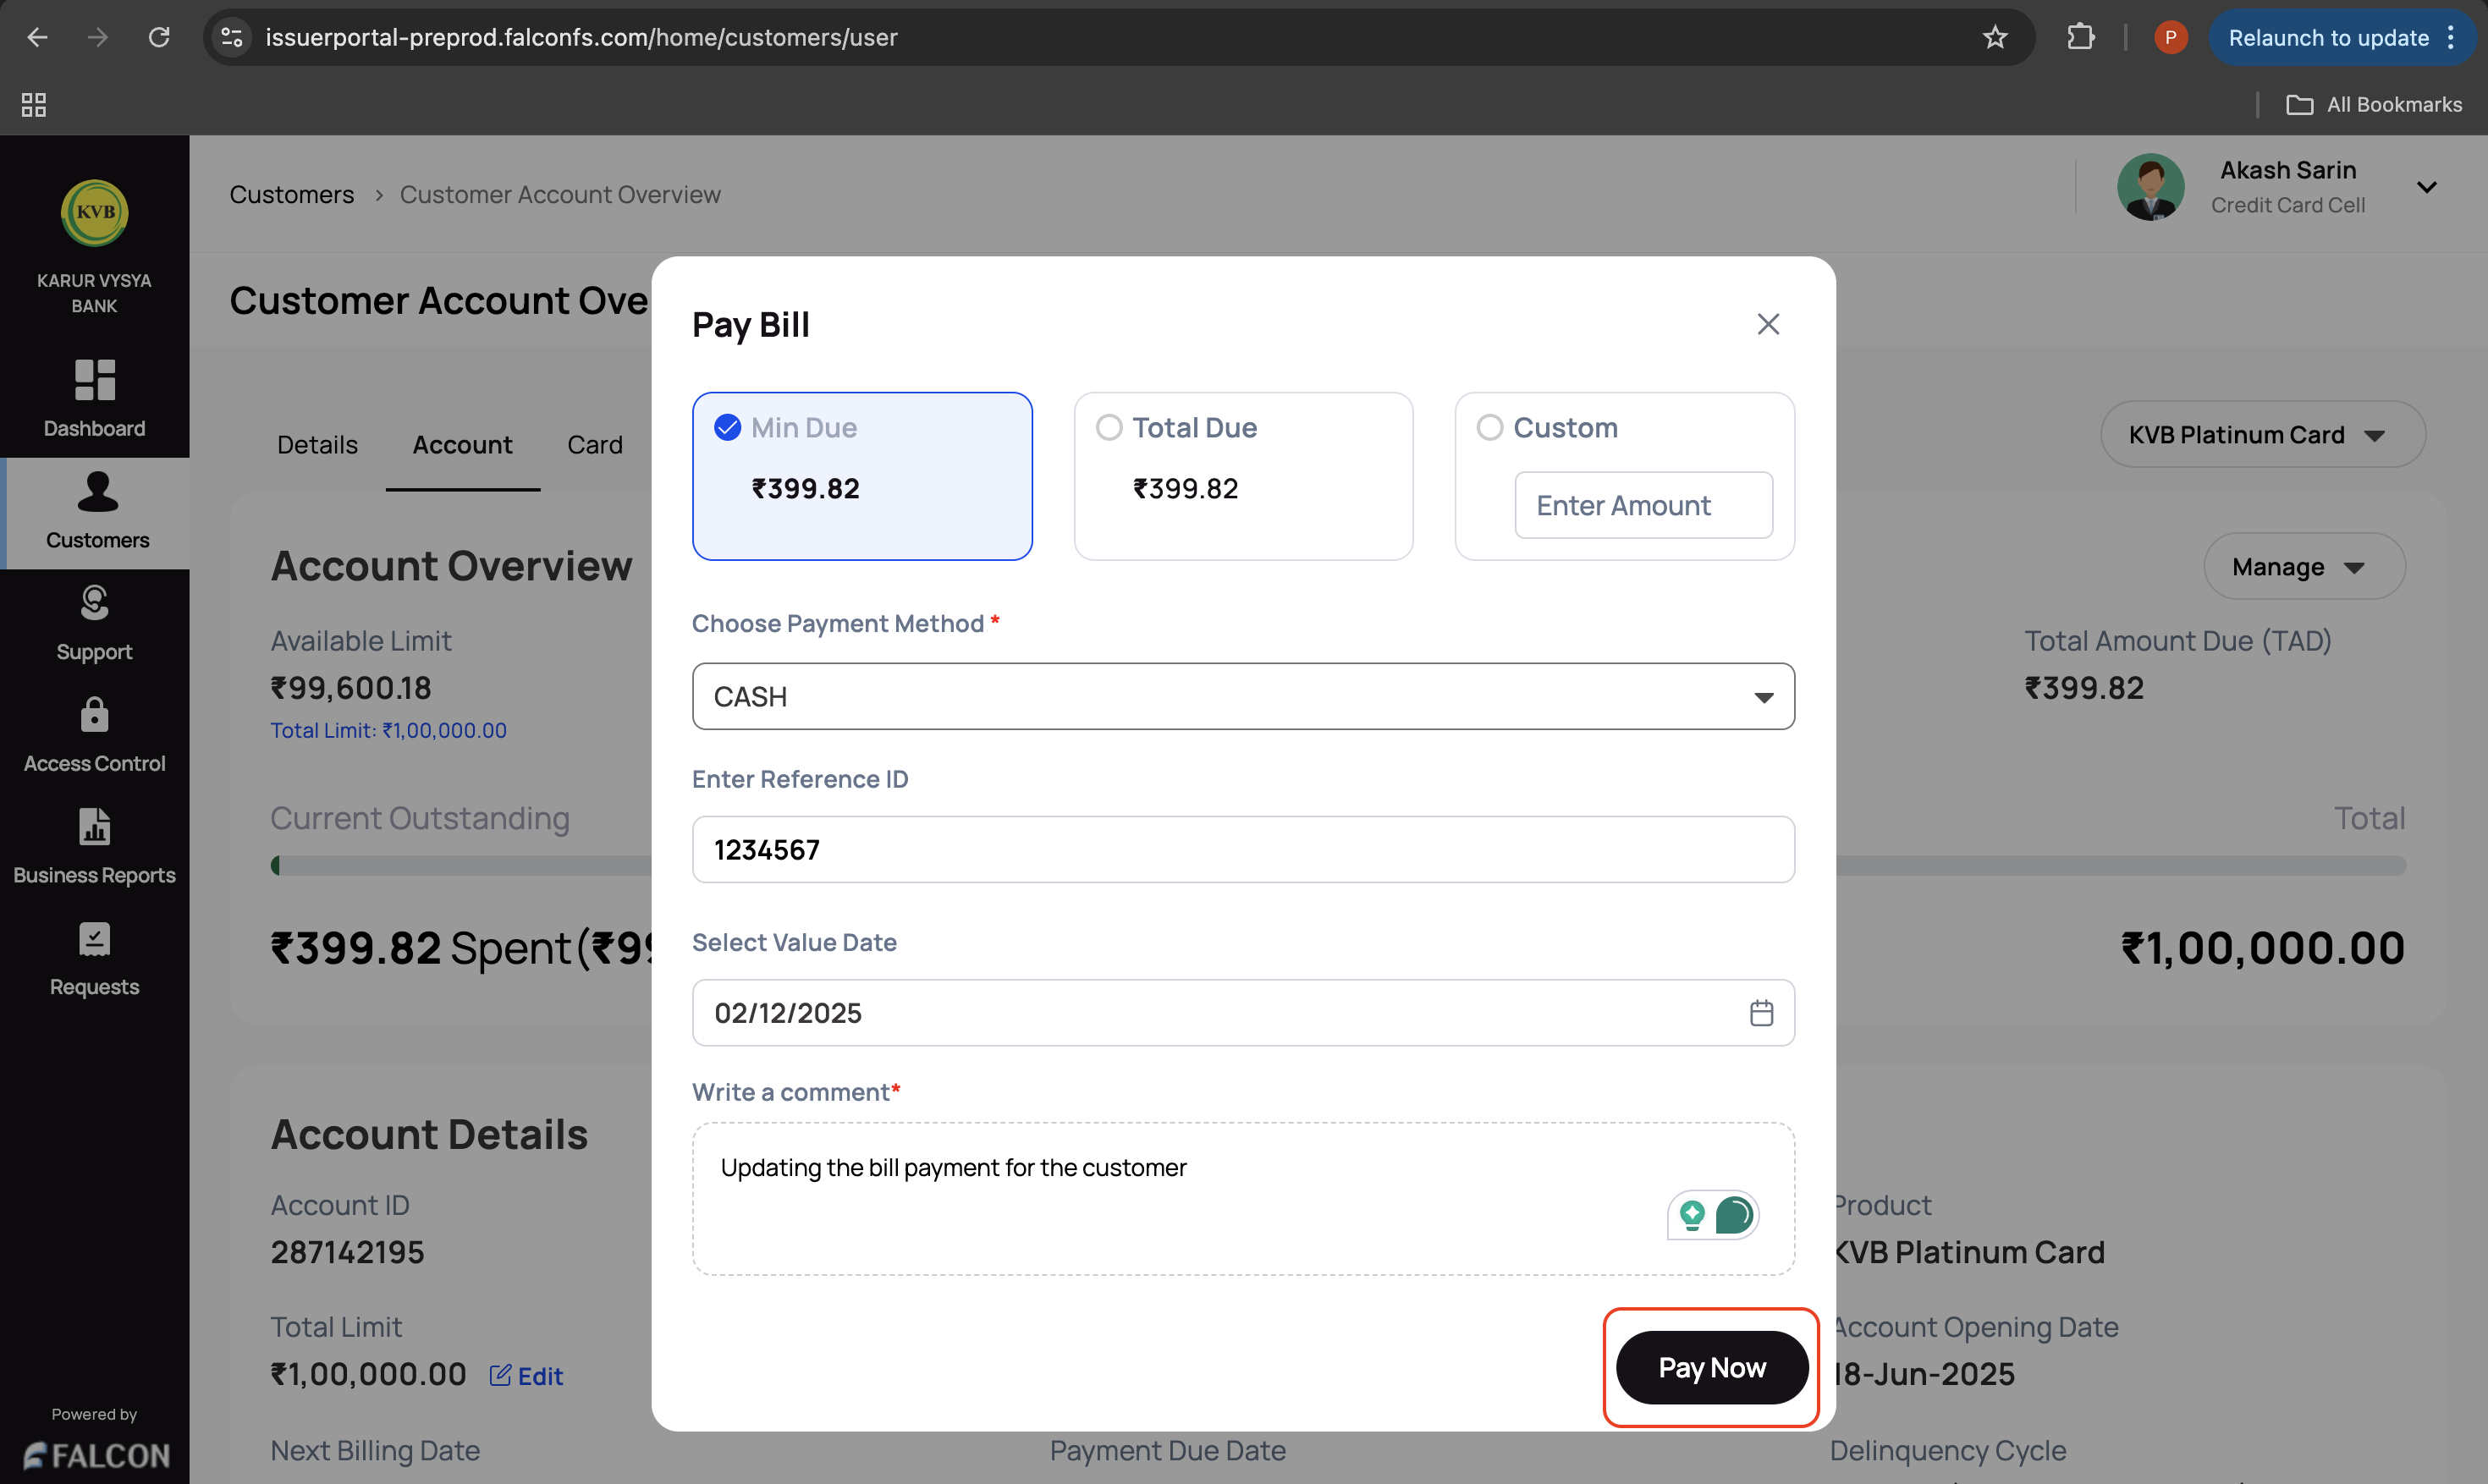
- Provide the following details in the Pay Bill pop-up page.
- Select either Min Due, Total Due, or Custom (enter the custom amount in the provided field).
- Choose Payment Method: Choose the payment method from the drop-down list. This is a mandatory field.
- Enter Reference ID
- Select Value Date
- Write a comment: Provide a comment. This is a mandatory field.
- Click Pay Now to submit the request.
You have successfully raised the pay bill request. You can check the status of the request in the Requests page.
🧾 Post a Fee
This action is used when a bank should manually apply a service charge or penalty to a customer's account.
Examples:
- Applying late payment fees, annual fees
The system posts a debit entry against the account, reflecting the specified fee amount and description.
To post a fee:
-
Log in to the issuer dashboard using the role-based credentials.
-
If a user is:
- An admin maker: Click the customer to pay the bill.
- A support maker: Click the customer, select any two customer details to authenticate, and click Submit.
-
Go to the Account tab, click the Manage drop-down displayed in the top-right corner of the Account Overview section, and click Post Fee.

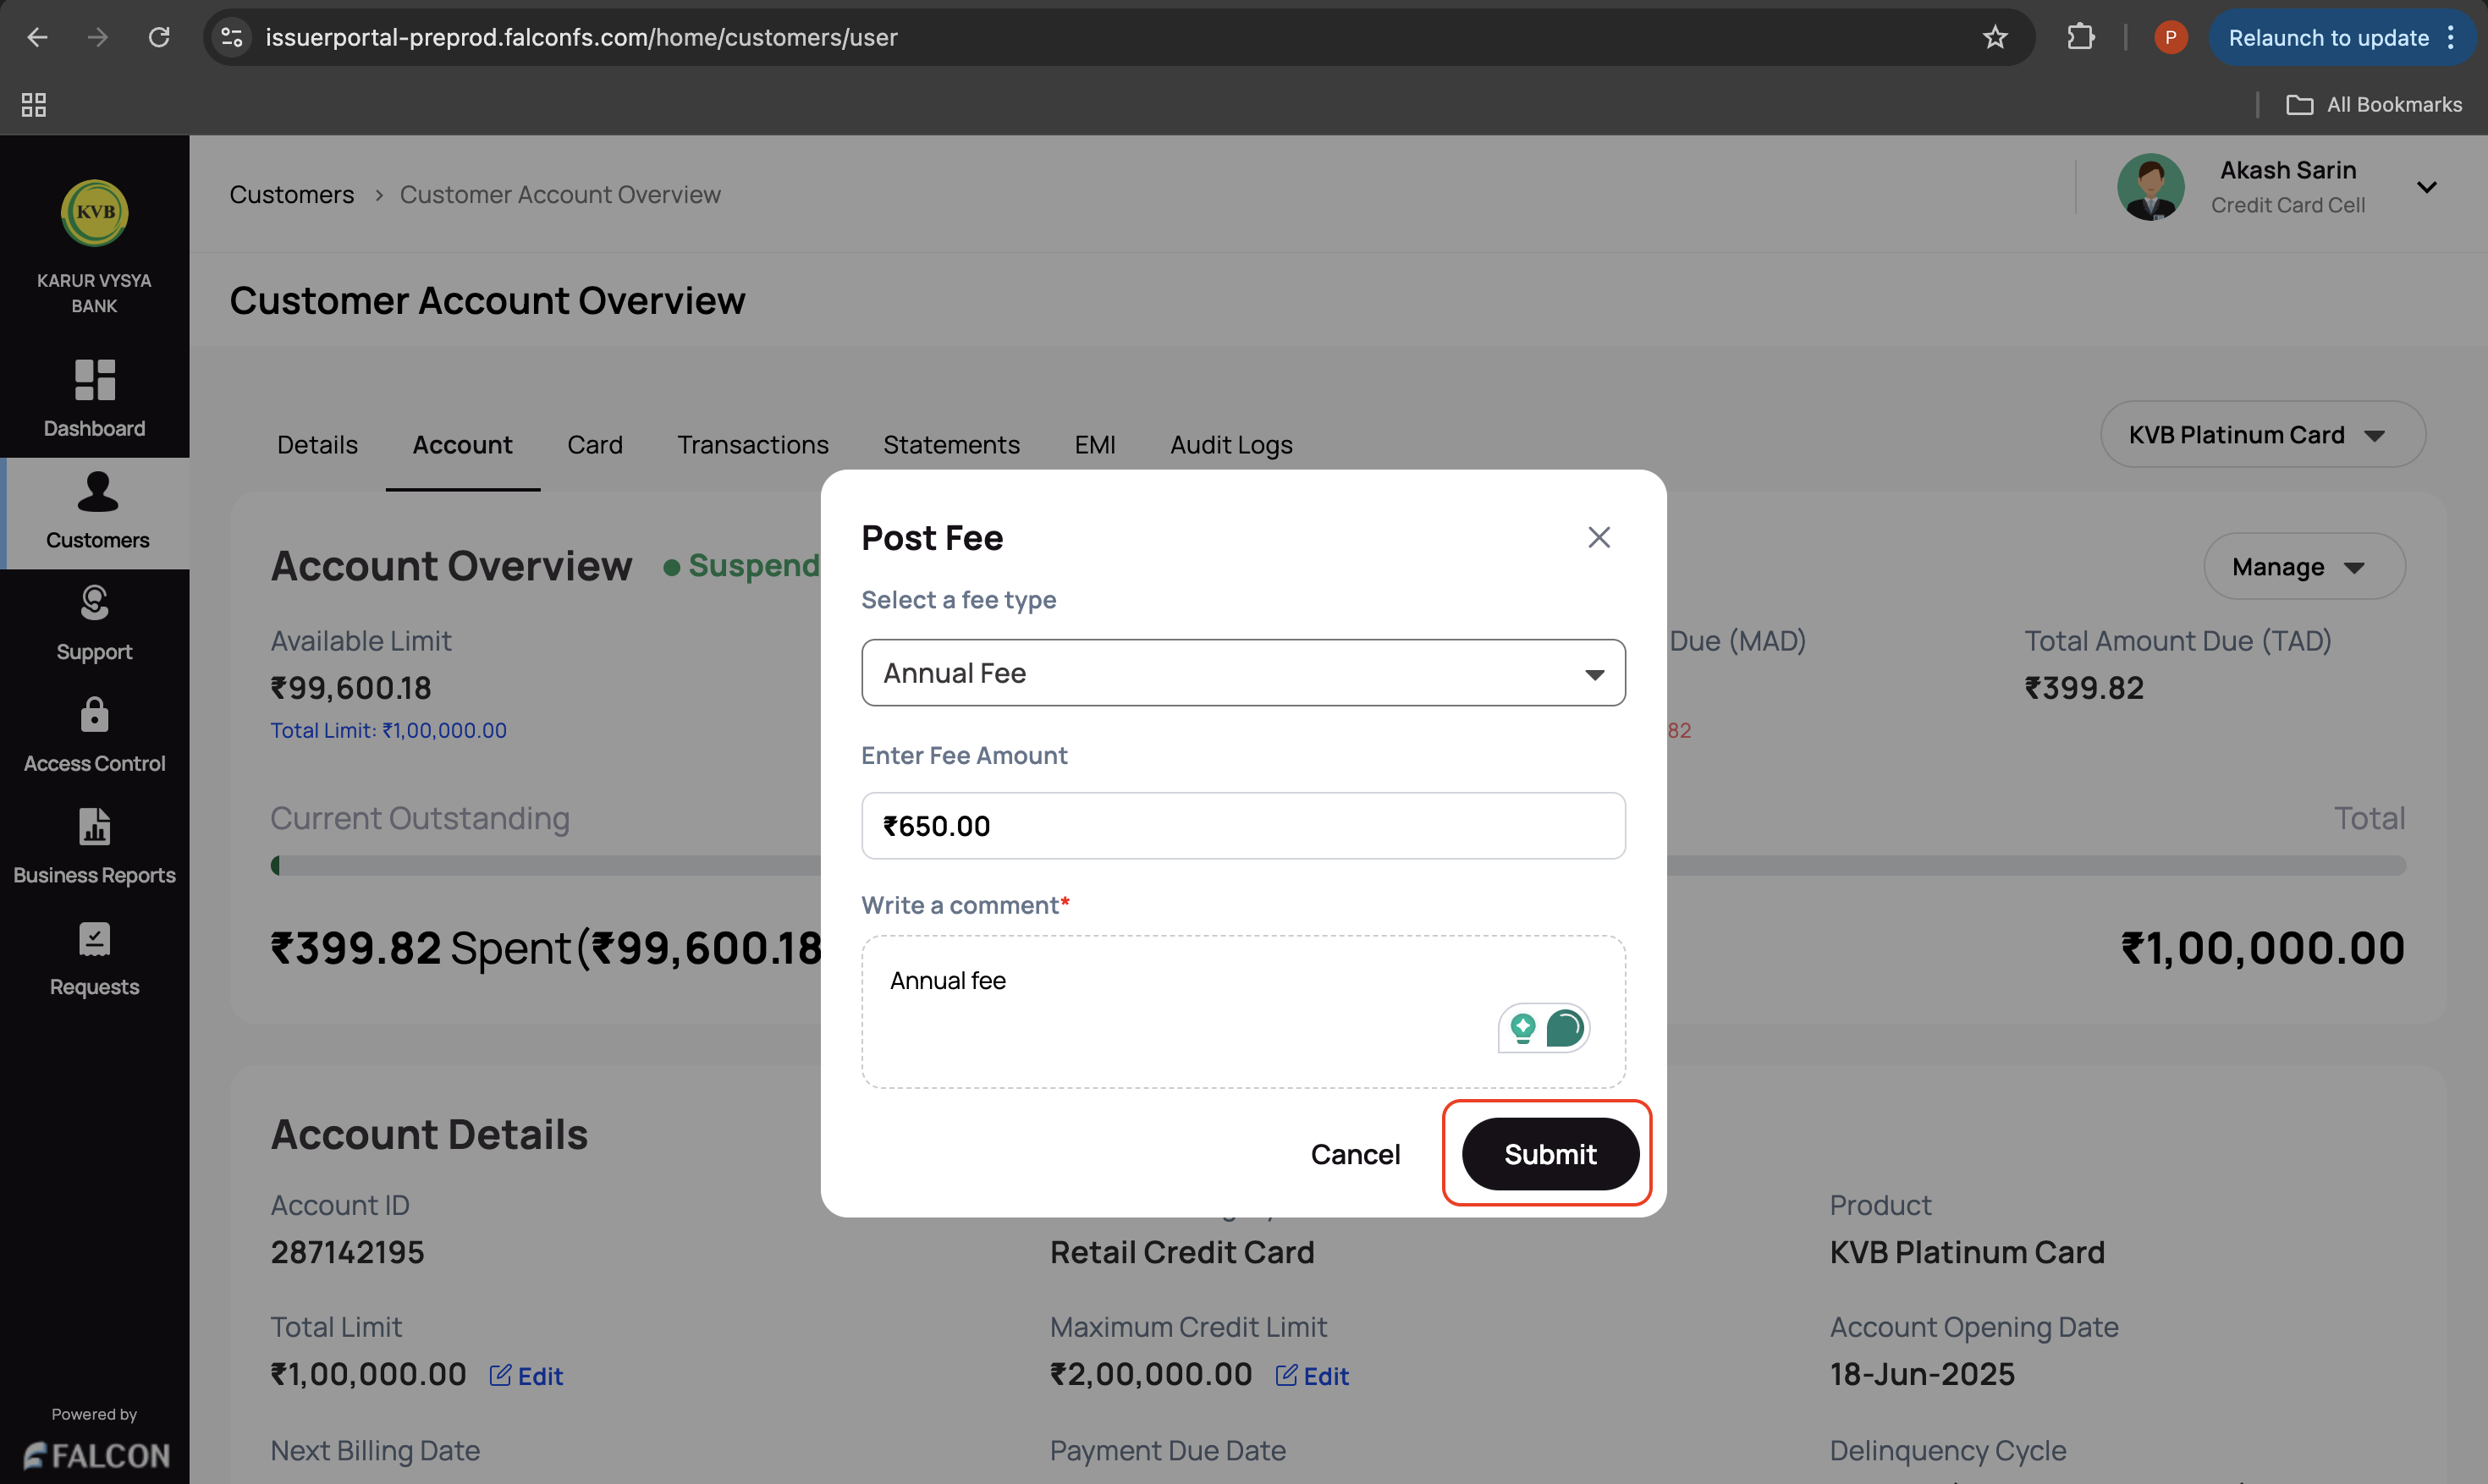
- Provide the following details in the Post Fee pop-up page.
- Select a fee type: Select a fee type to post from the drop-down list.
- Enter Fee Amount
- Write a comment: This is a mandatory field.
- Click Submit to submit the request.
You have successfully raised the post fee request. You can check the status of the request in the Requests page.
🛠️ Update a Card Program
This action is used when a bank wants to update the card program of a customer.
To update a card program:
-
Log in to the issuer dashboard using the role-based credentials.
-
If a user is:
- An admin maker: Click the customer to pay the bill.
- A support maker: Click the customer, select any two customer details to authenticate, and click Submit.
-
Go to the Account tab, click the Manage drop-down displayed in the top-right corner of the Account Overview section, and click Update Card Program.
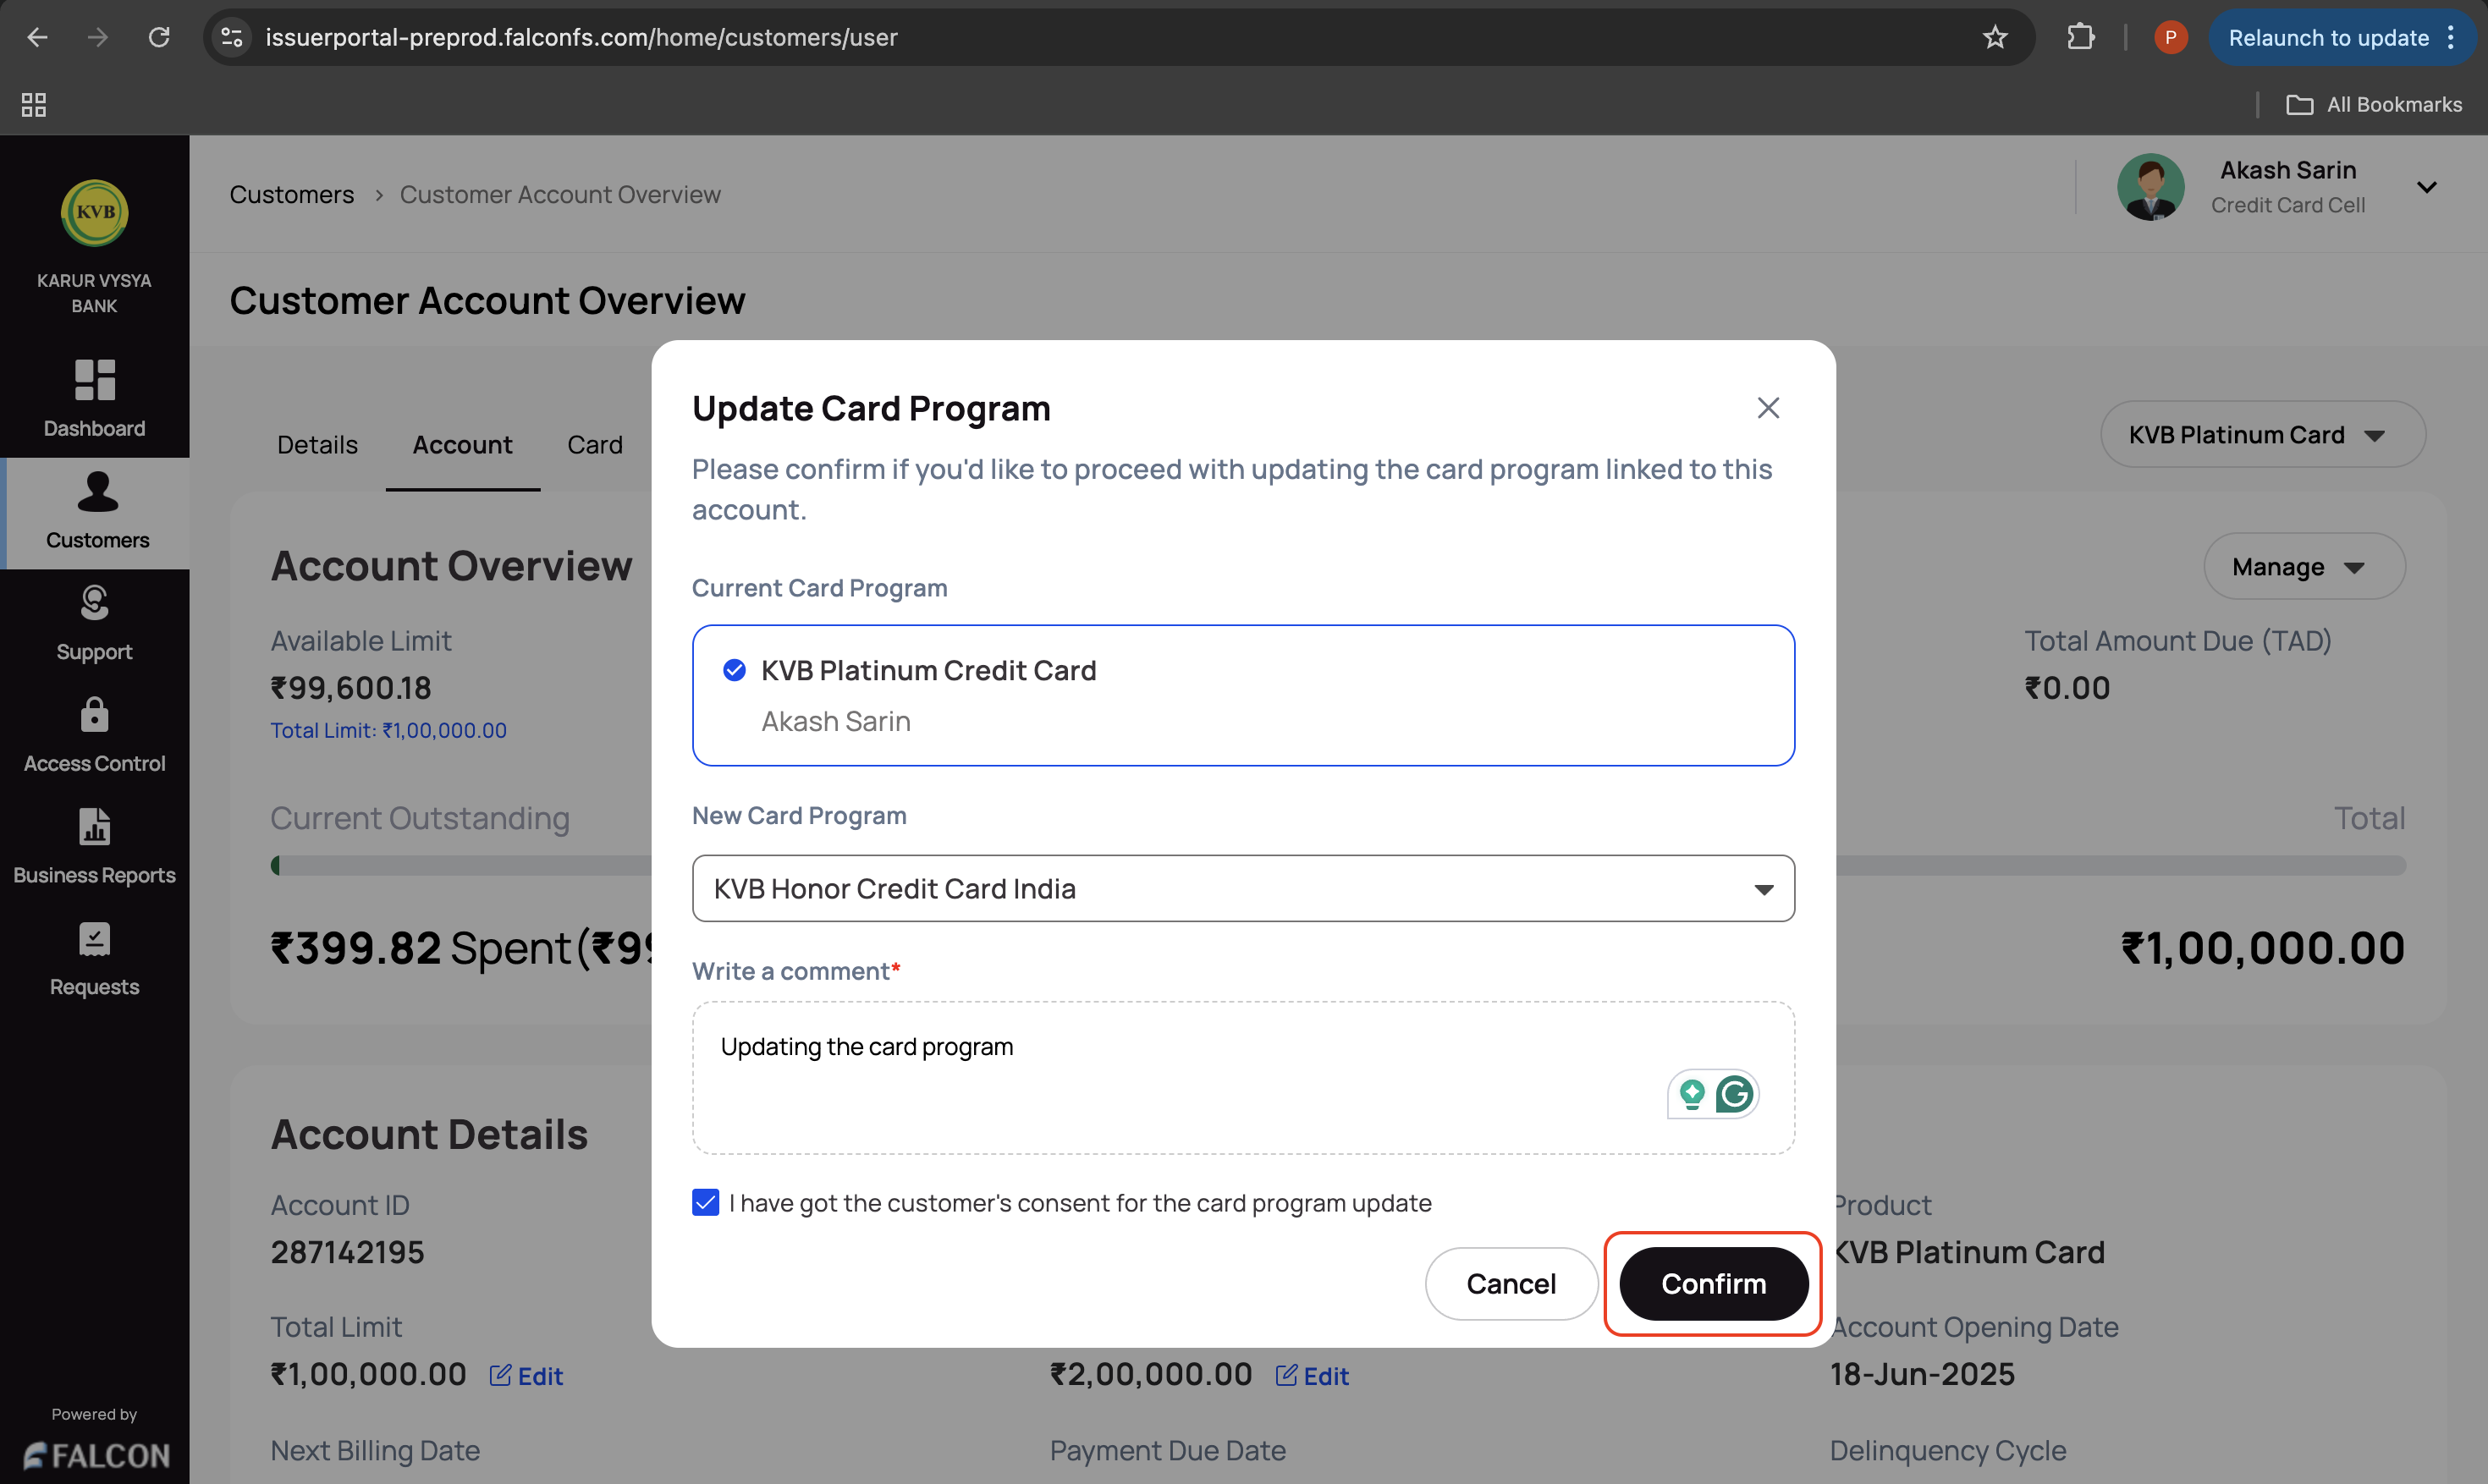
- Provide the following details on the Update Card Program pop-up page.
- New Card Program: Select a new card program from the drop-down list.
- Write a comment: This is a mandatory field.
- Select the consent checkbox to confirm that you have obtained the customer's consent for the card program update.
- Click Confirm to submit the request.
You have successfully raised the card program update request. You can check the status of the request in the Requests page.
✏️ Edit Total Limit Amount
This action is used when a bank wants to edit the total limit of a card.
To edit the total limit amount:
-
Log in to the issuer dashboard using the role-based credentials.
-
If a user is:
- An admin maker: Click the customer to pay the bill.
- A support maker: Click the customer, select any two customer details to authenticate, and click Submit.
-
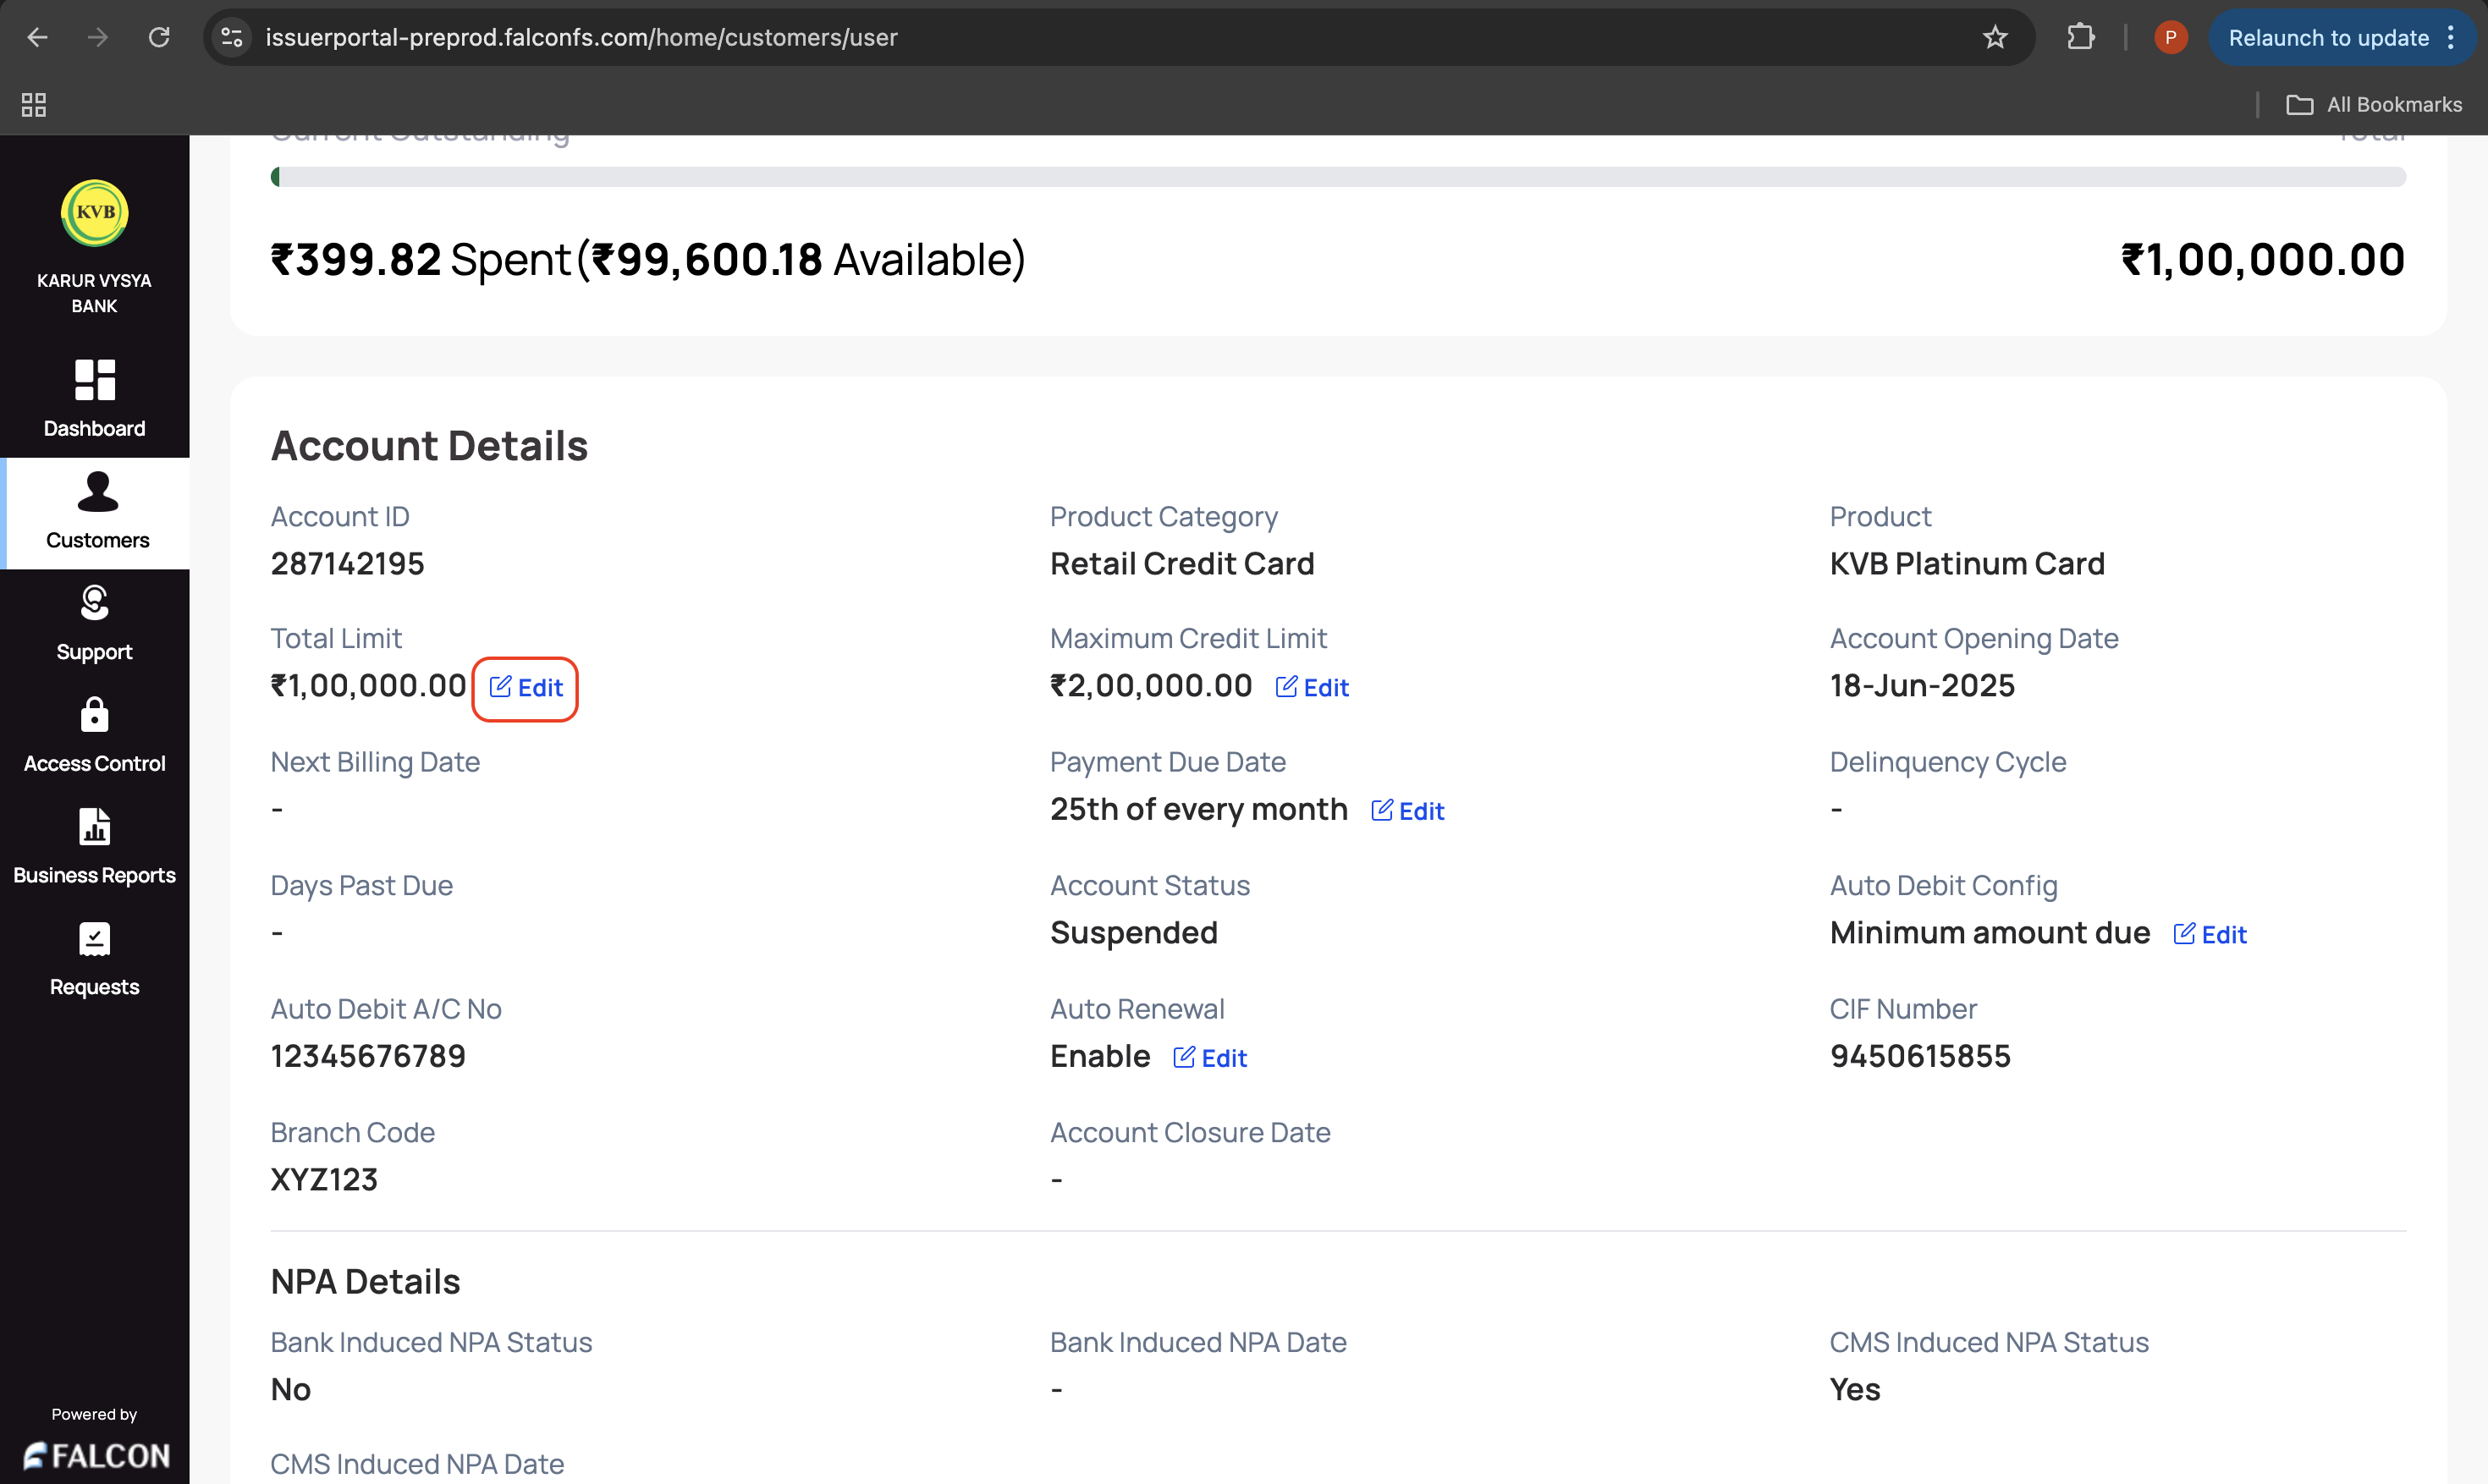
Go to the Account tab and click Edit displayed in the Total Limit field under the Account Details section.
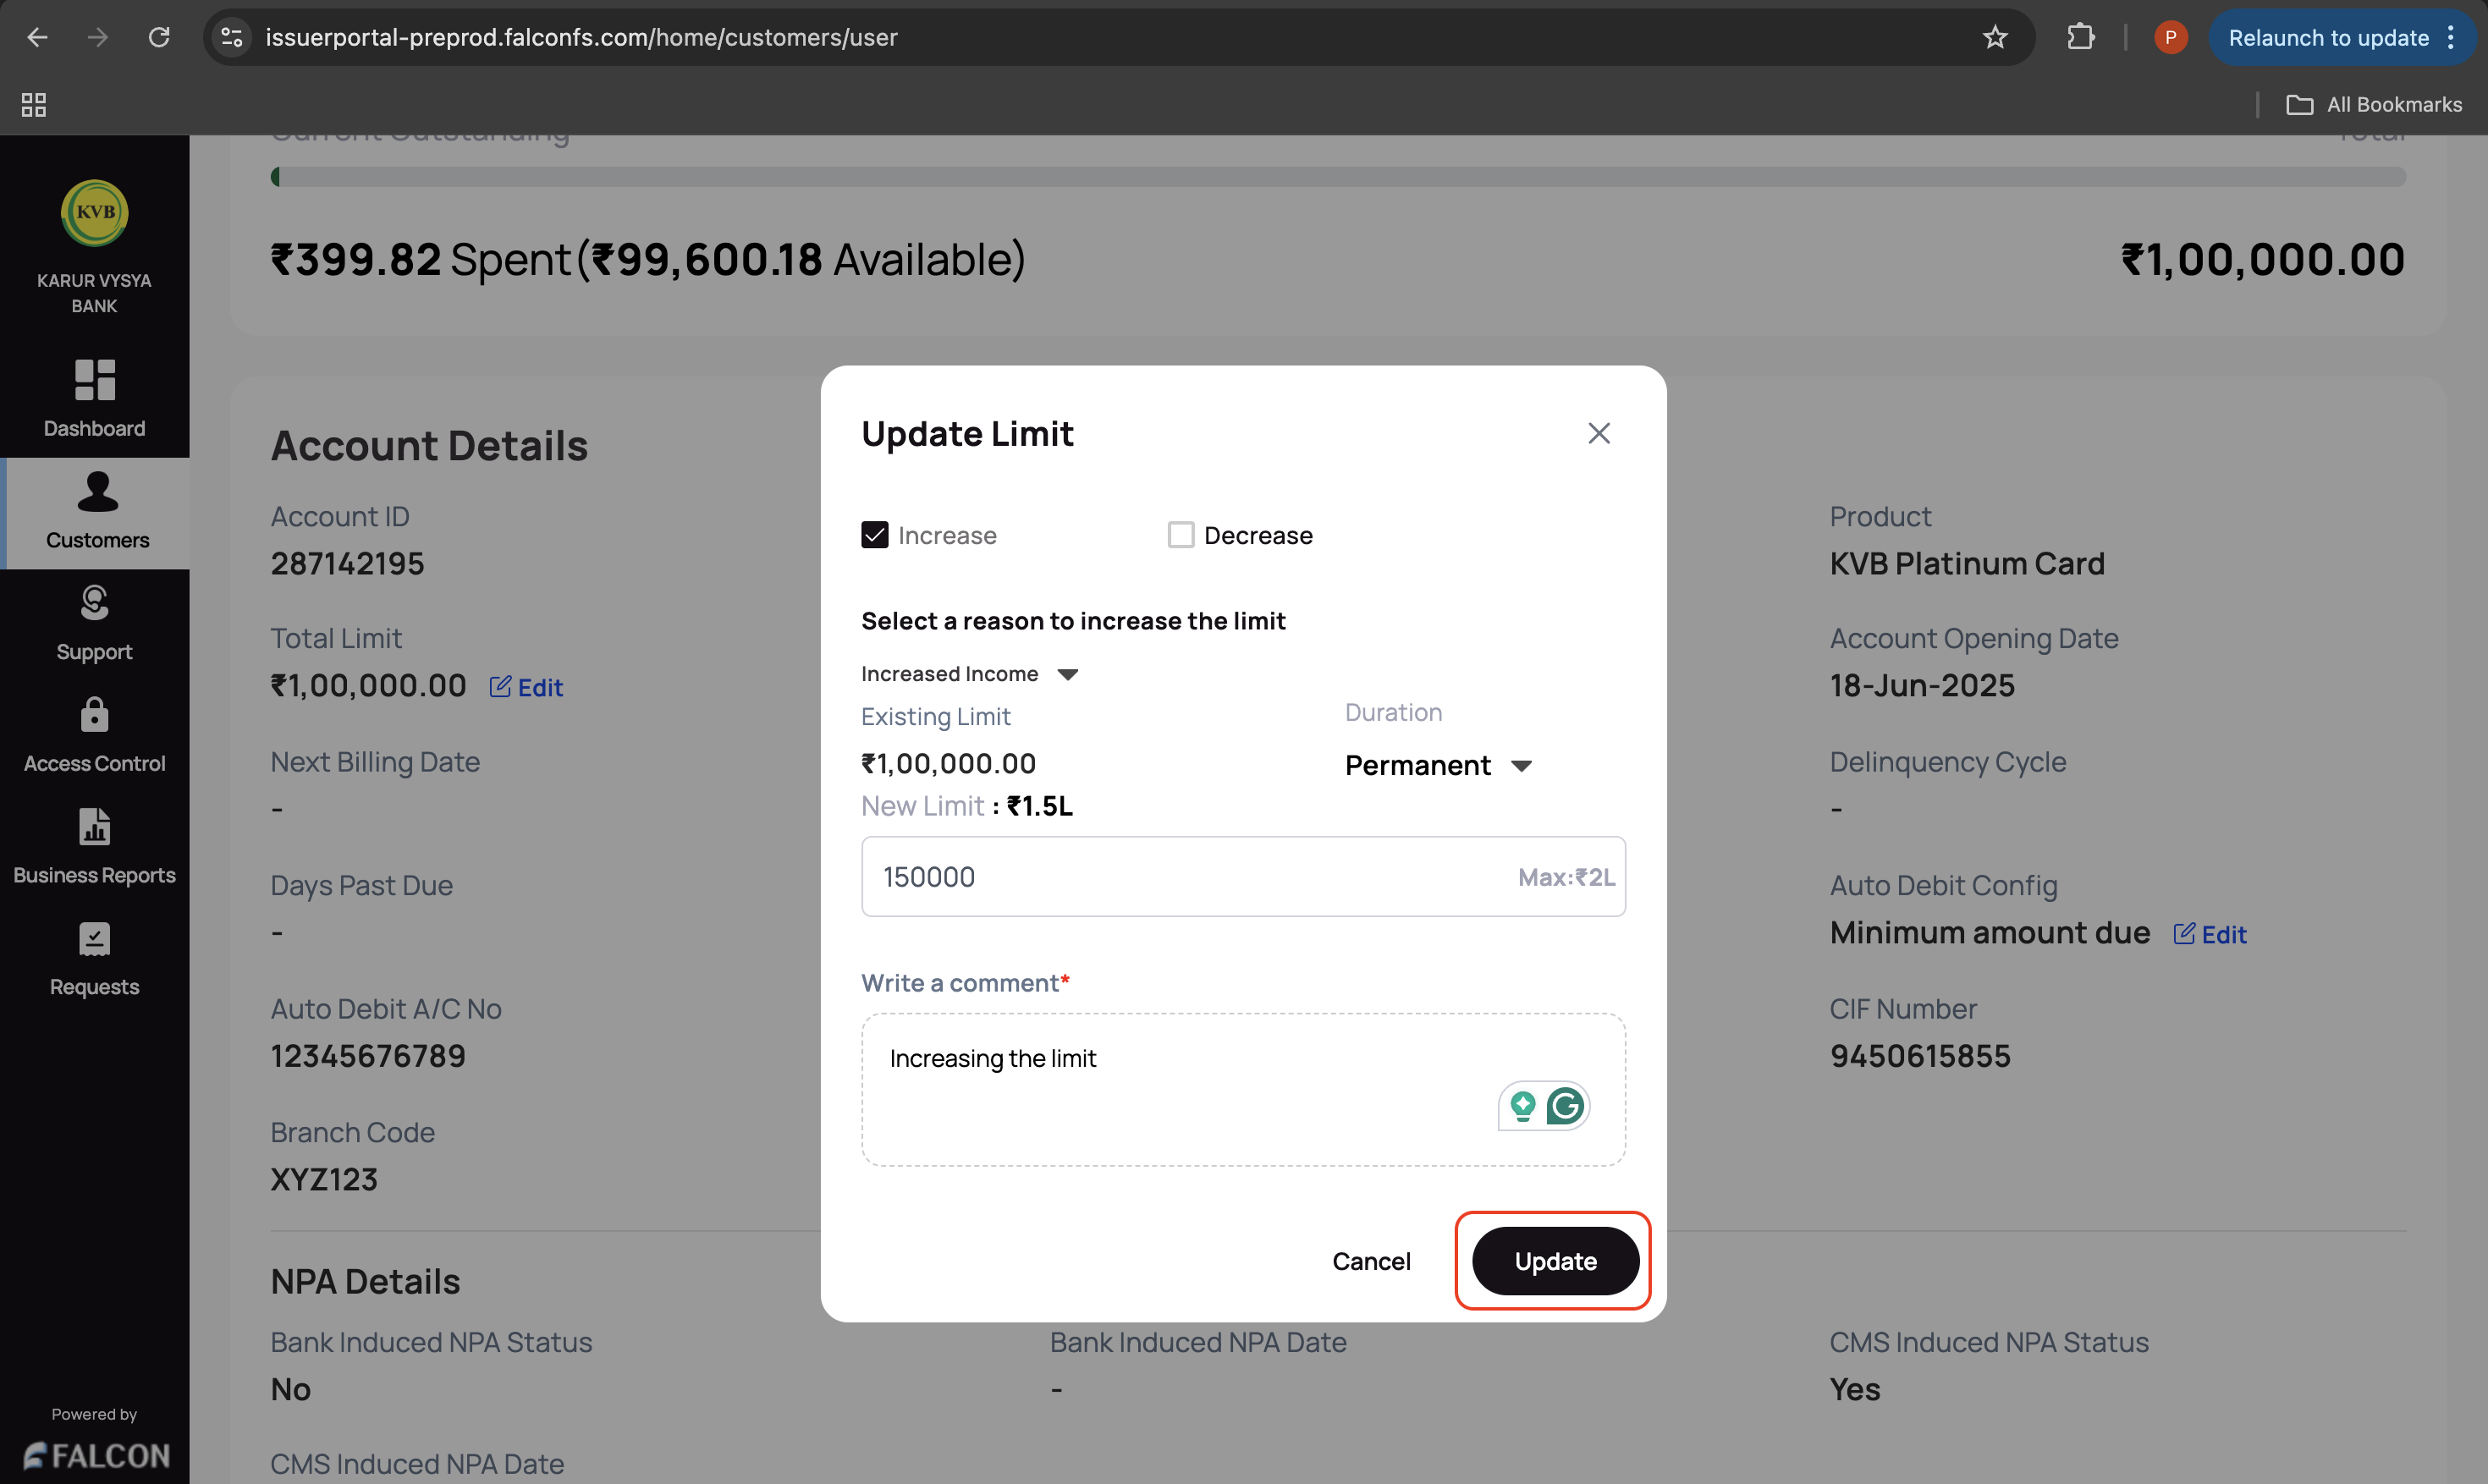
- Provide the following details in the Update Limit pop-up page.
- Increase/Decrease: Select the required checkbox.
- Select the reason to increase/decrease the limit from the drop-down list.
- Select the update duration from the Duration drop-down list. The following options are available.
- Permanent: The update is permanent.
Temporary - Custom Dates: Select the custom date if you choose this option.
- Permanent: The update is permanent.
- New Limit: Enter the new limit.
- Write a comment: This is a mandatory field.
- Click Update to submit the request.
You have successfully raised a total limit update request. You can check the status of the request in the Requests page.
📈 Edit Maximum Credit Limit
This action is used when a bank wants to edit the maximum credit limit of a card.
To edit the maximum credit limit amount:
-
Log in to the issuer dashboard using the role-based credentials.
-
If a user is:
- An admin maker: Click the customer to pay the bill.
- A support maker: Click the customer, select any two customer details to authenticate, and click Submit.
-
Go to the Account tab and click Edit displayed in the Maximum Credit Limit field under the Account Details section.
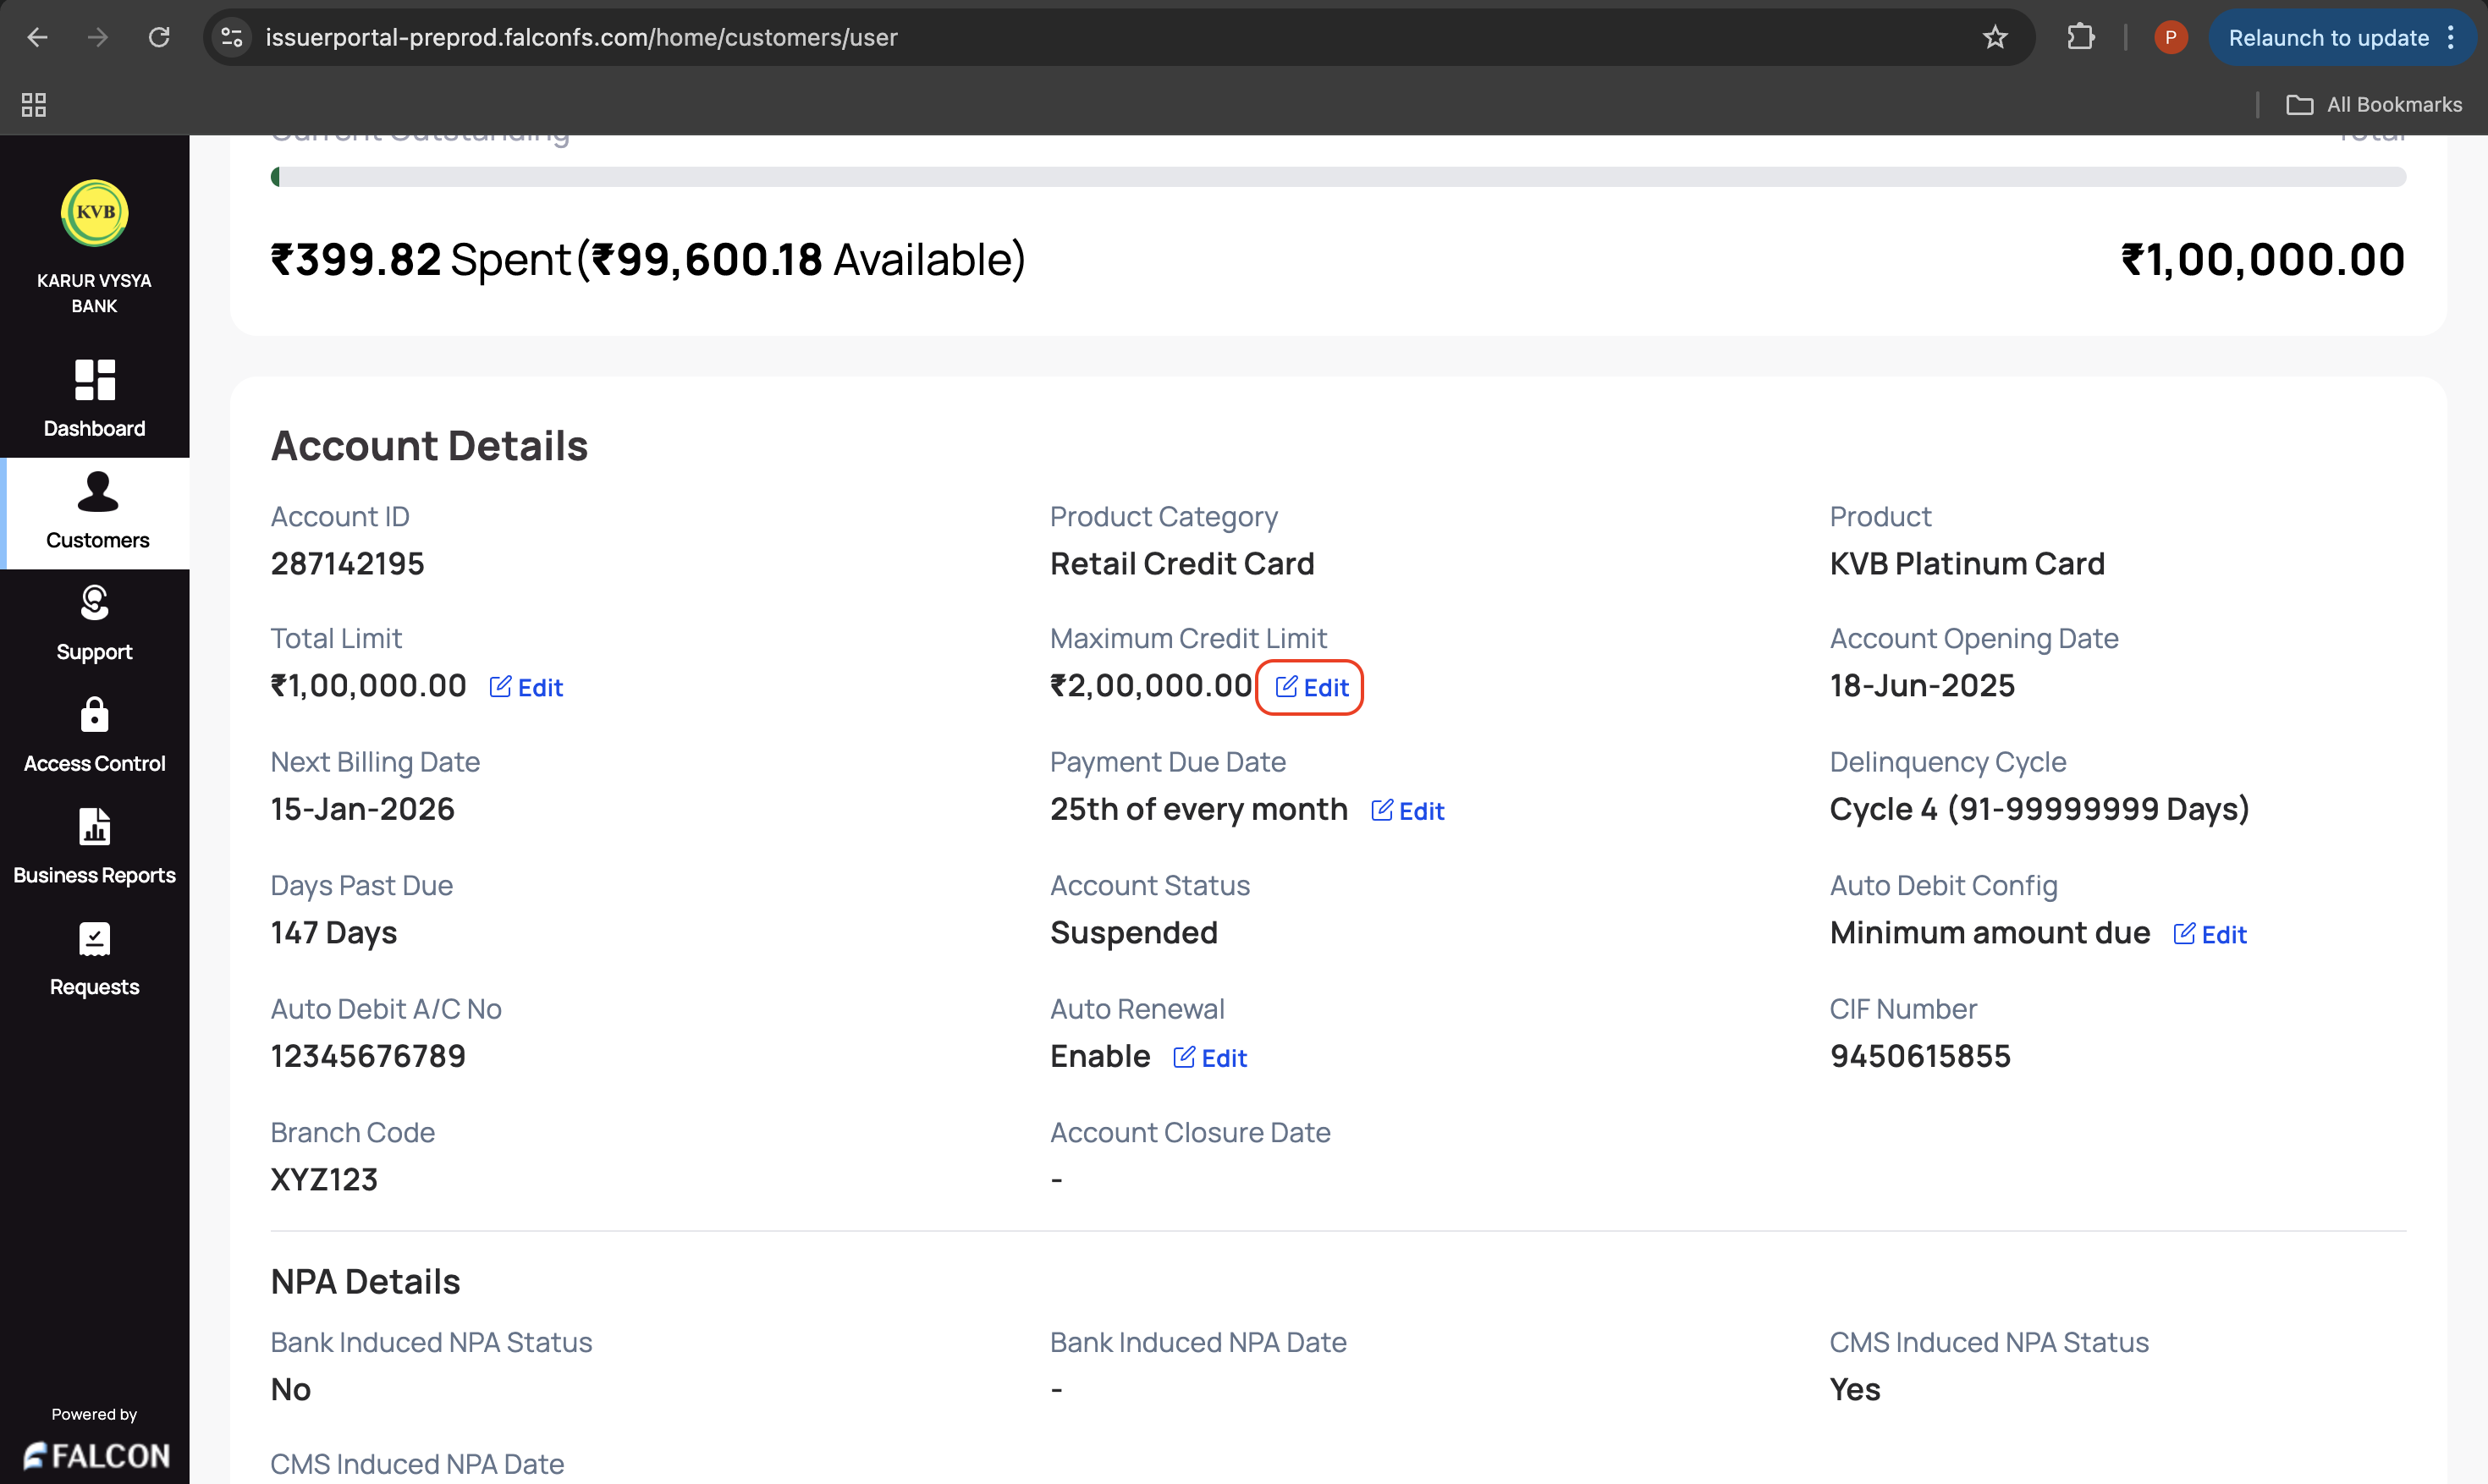
- Provide the following details in the Update Maximum Credit Limit pop-up page.
- New Maximum Credit Limit: Enter the new max credit limit. Ensure this amount is greater than the current and less than the Program Credit Limit.
- Write a comment: This is a mandatory field.
- Click Confirm to submit the request.
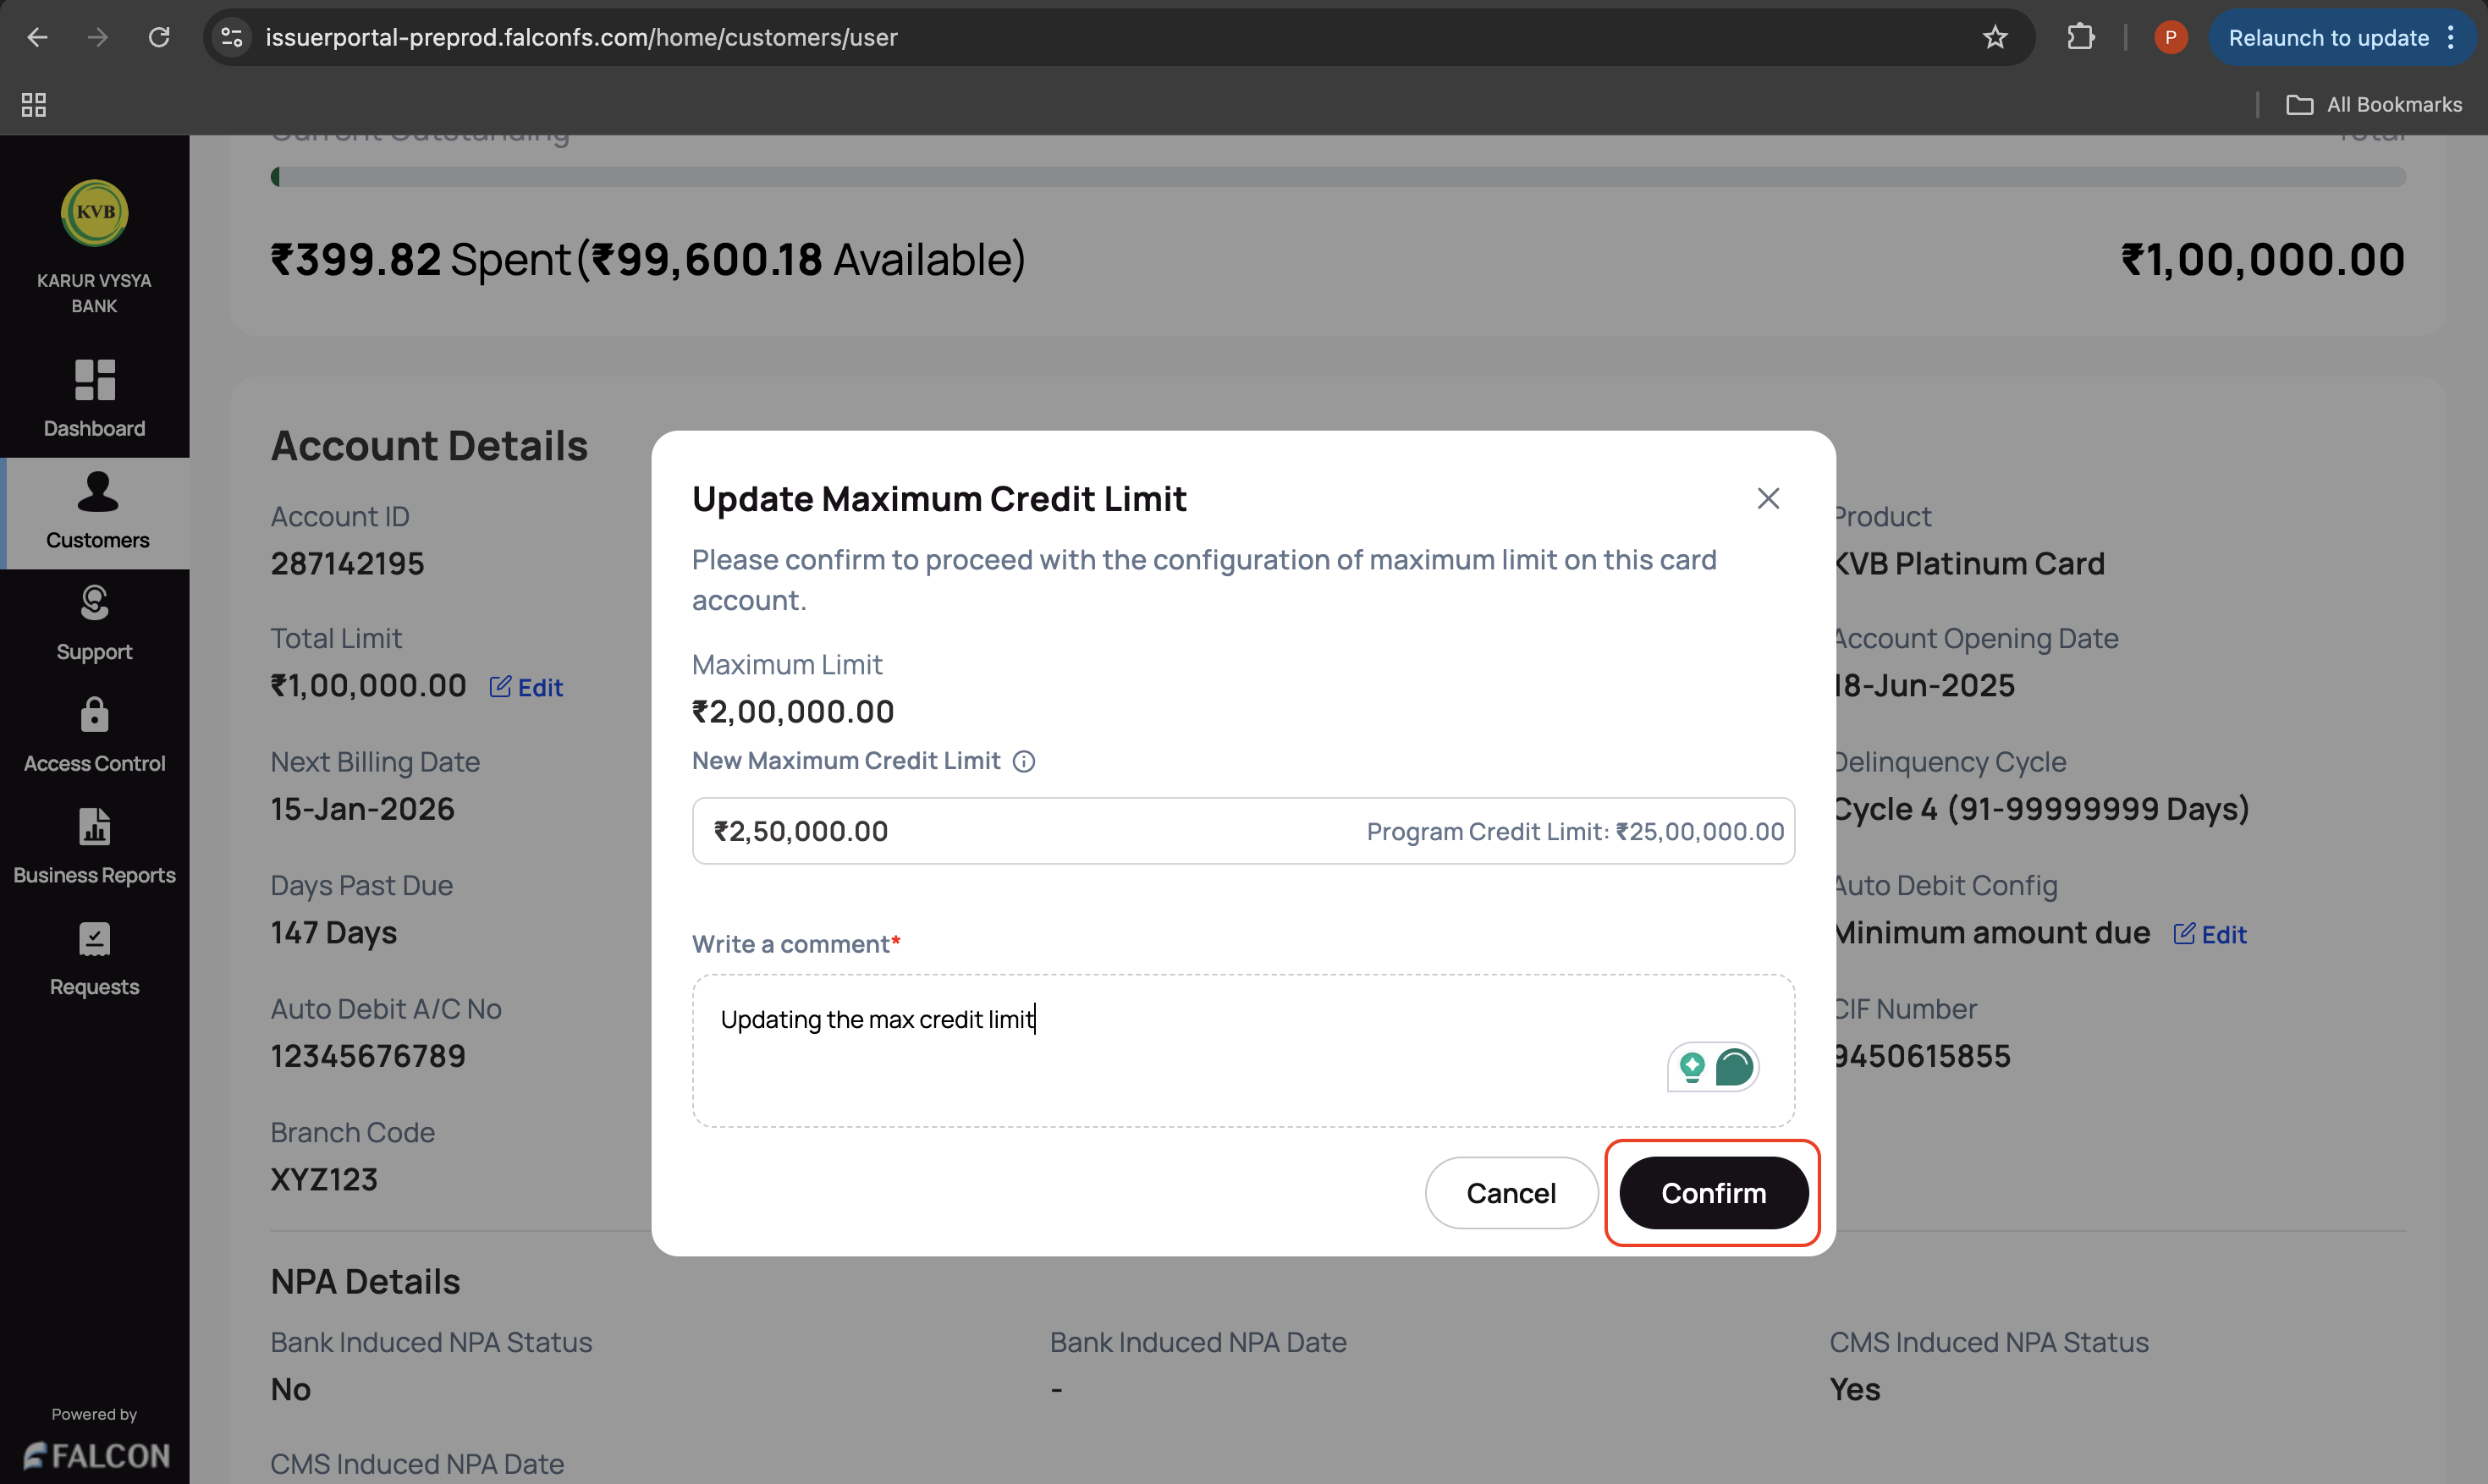
You have successfully raised a max credit limit update request. You can check the status of the request in the Requests page.
📅 Update the Payment Due Date
This action is used when a bank wants to update the payment due date.
To edit the payment due date:
-
Log in to the issuer dashboard using the role-based credentials.
-
If a user is:
- An admin maker: Click the customer to pay the bill.
- A support maker: Click the customer, select any two customer details to authenticate, and click Submit.
-
Go to the Account tab and click Edit displayed in the Payment Due Date field under the Account Details section.
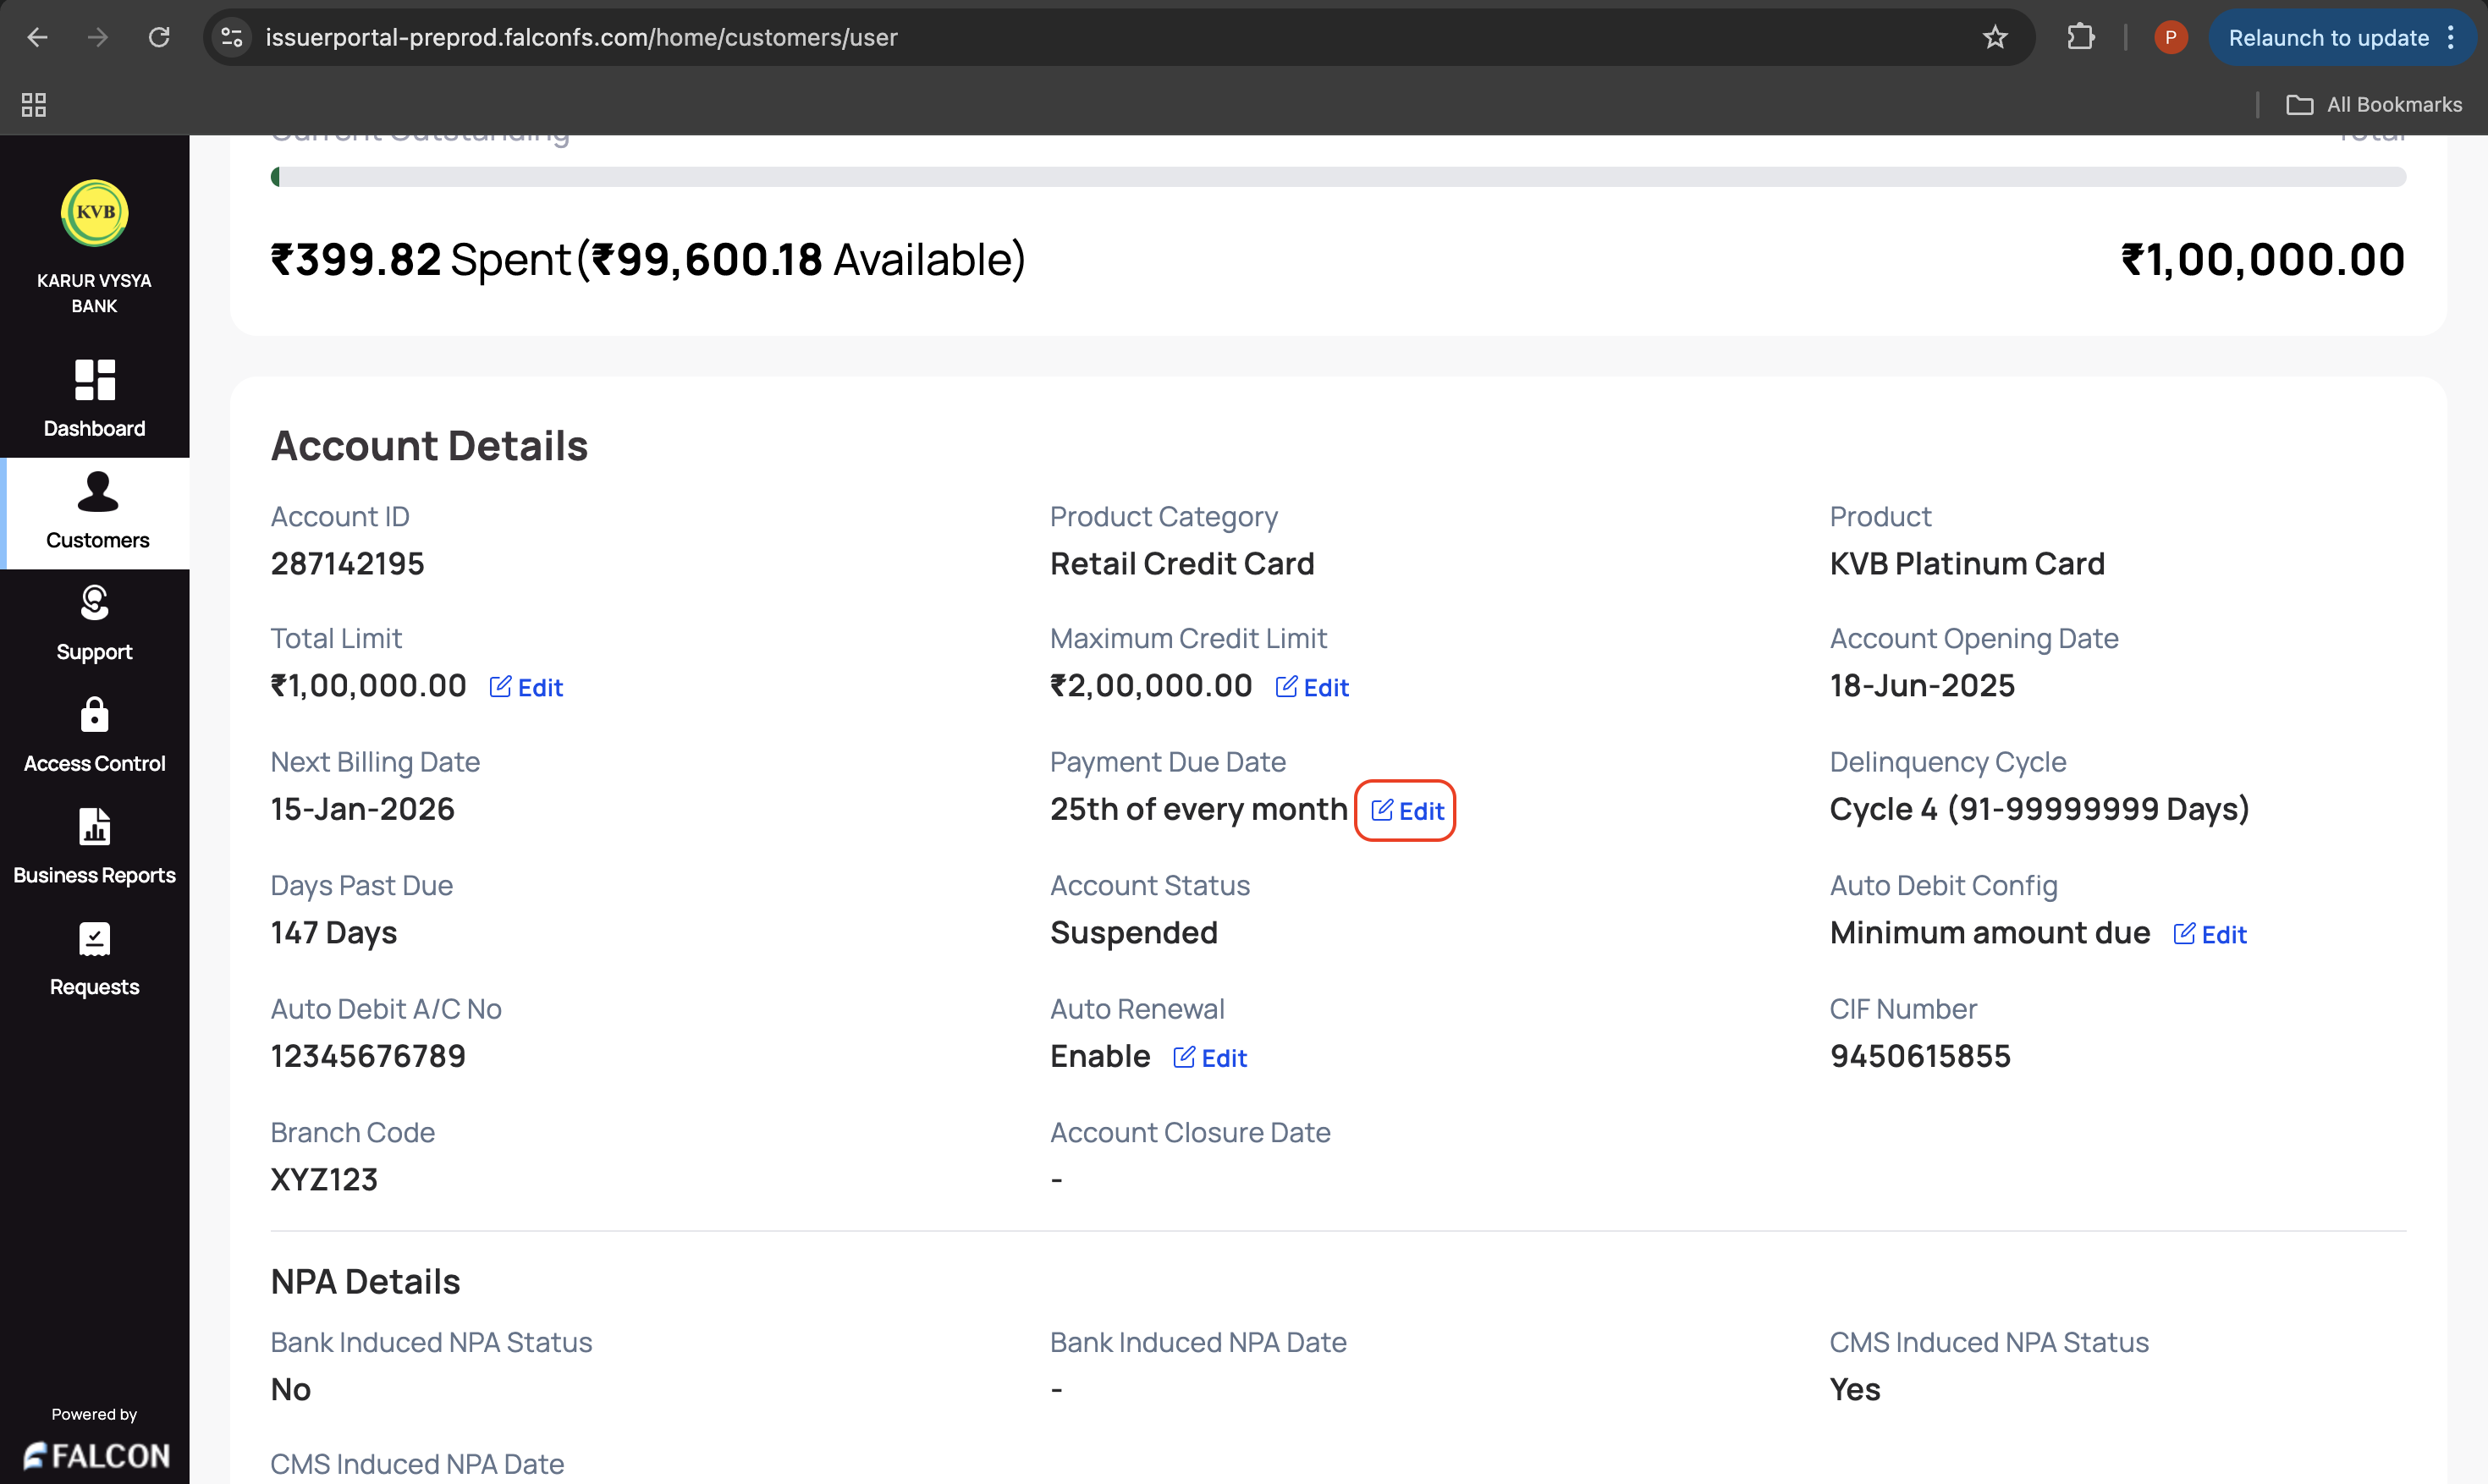
- Provide the following details on the Change Due Date pop-up page.
- Select New Due Date: Select the new date from the available options. The due date change becomes effective from the beginning of the next month's Statement.
- Write a comment: This is a mandatory field.
- Click Update to submit the request.
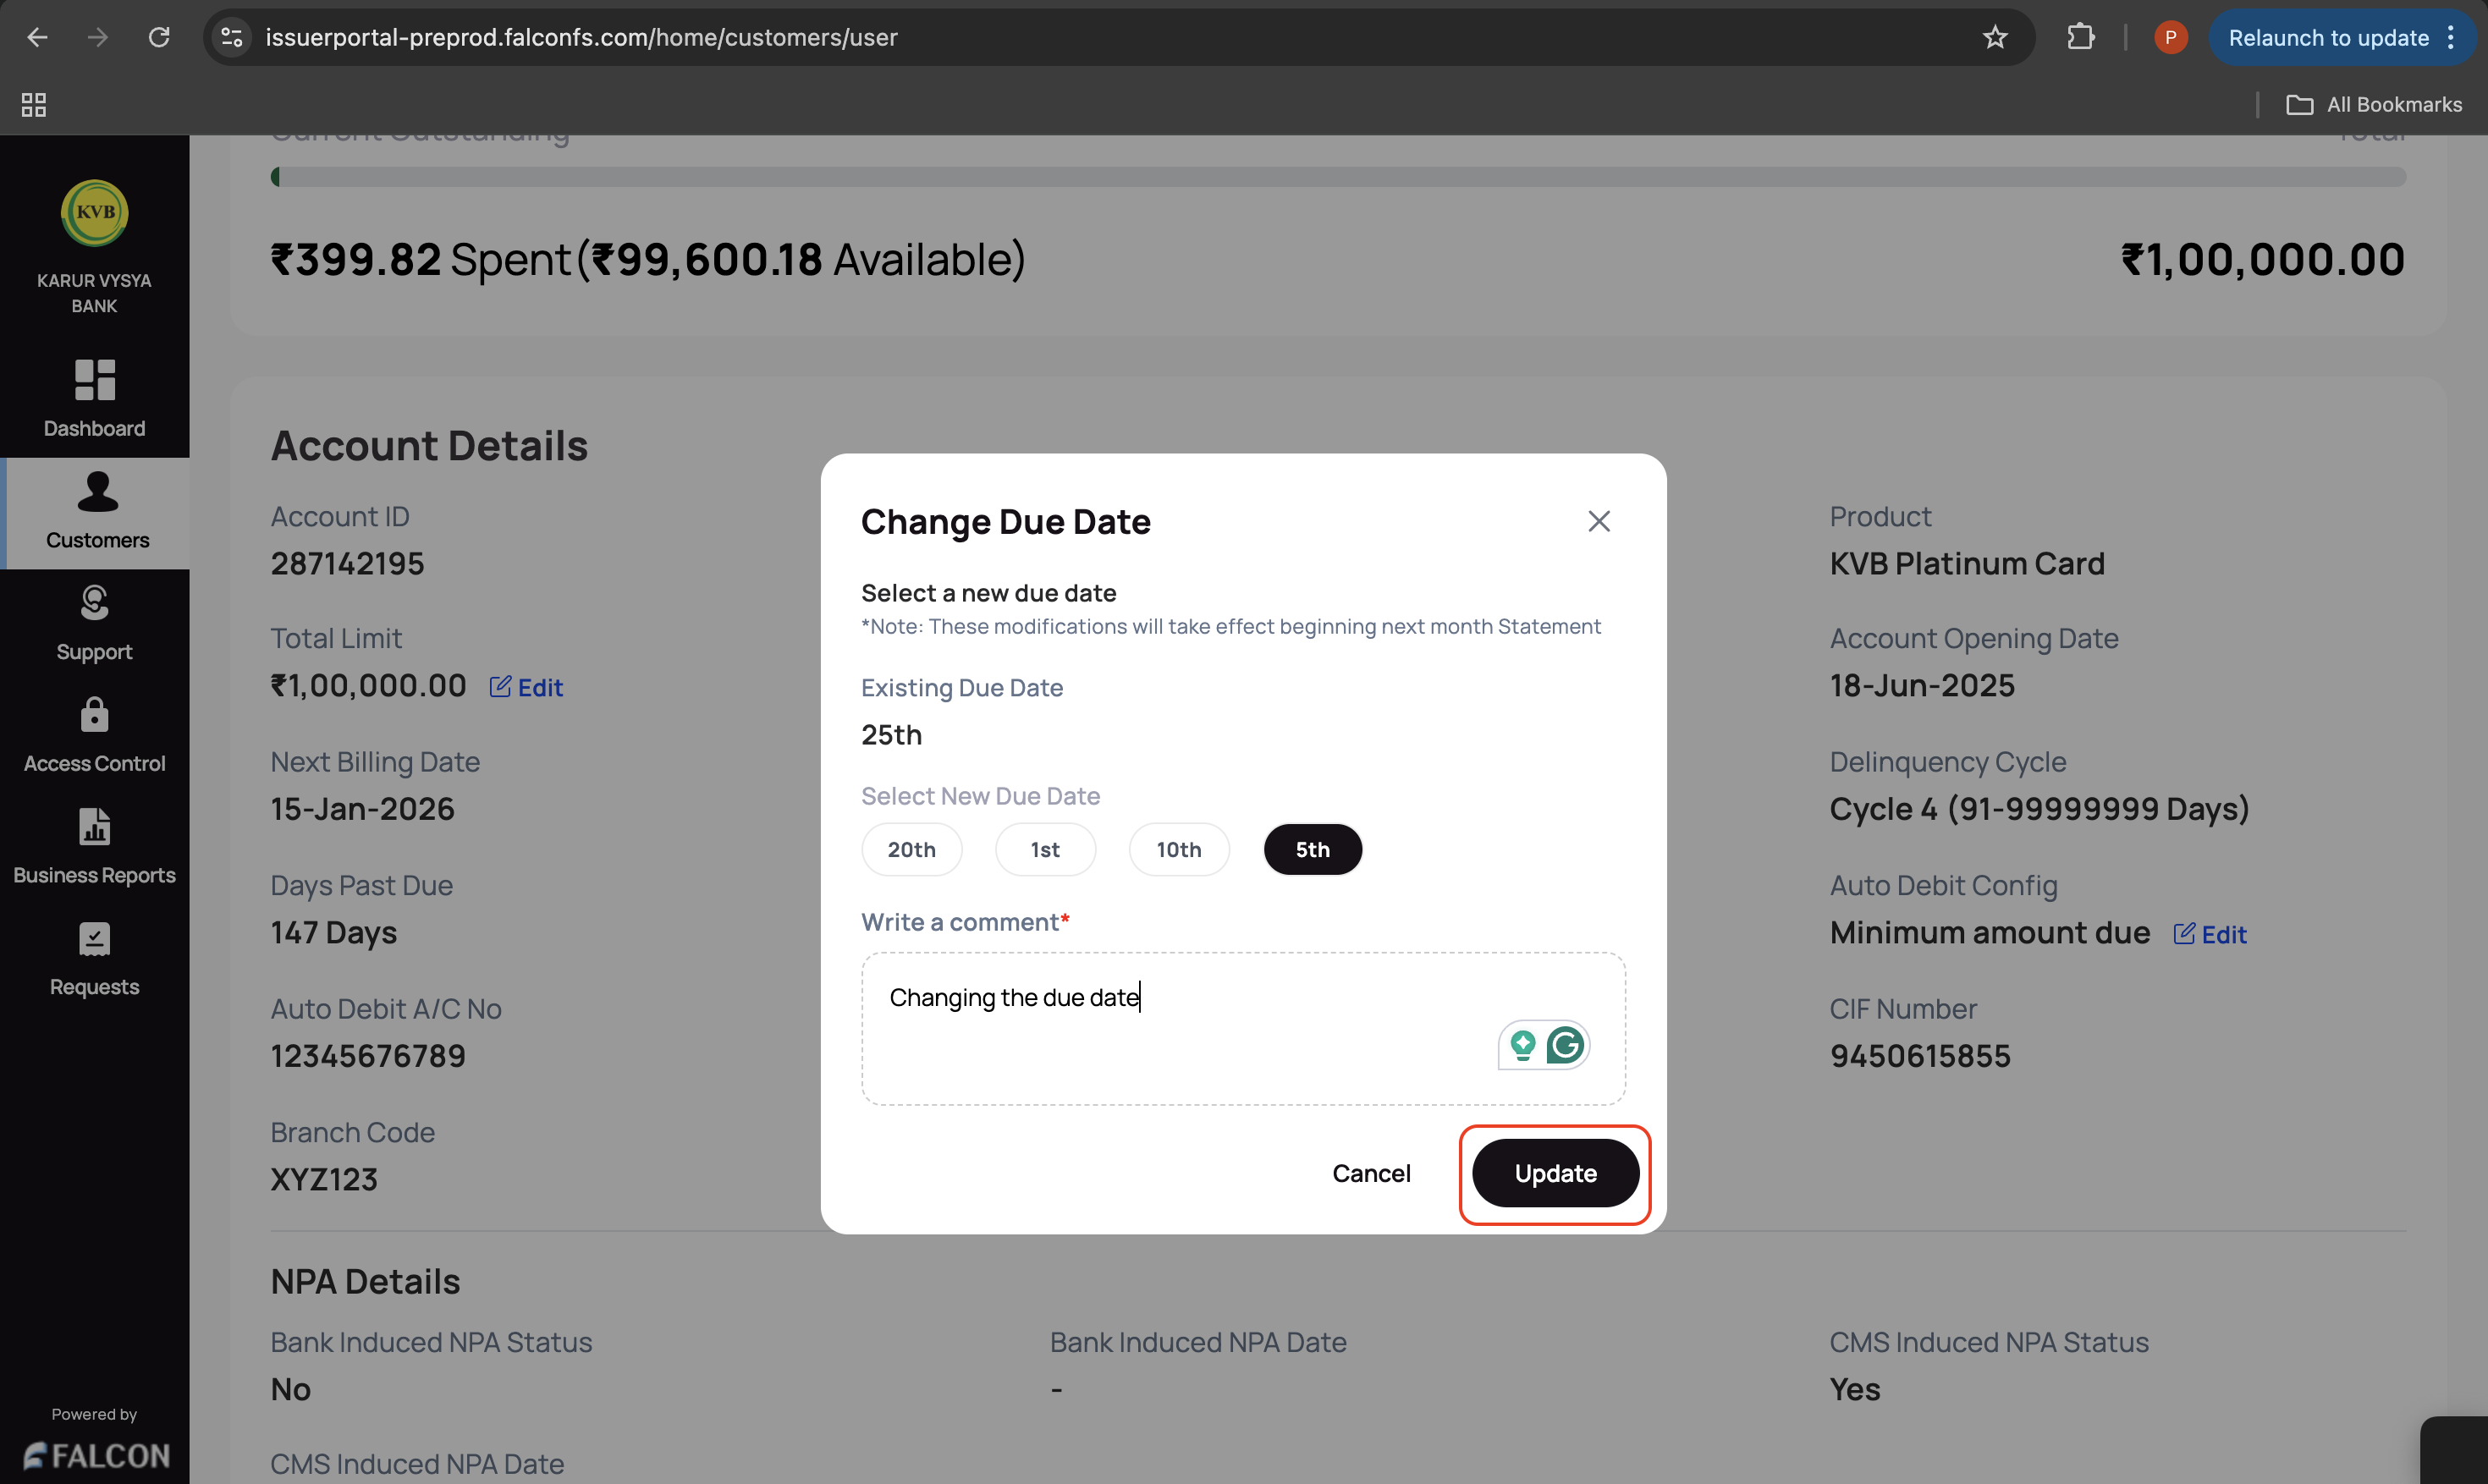
You have successfully raised a request to update the payment due date. You can check the status of the request in the Requests page.
🔁 Enable or Disable Auto Renewal
This action is used when a bank wants to update the auto-renewal configuration.
To update the auto-renewal:
-
Log in to the issuer dashboard using the role-based credentials.
-
If a user is:
- An admin maker: Click the customer to pay the bill.
- A support maker: Click the customer, select any two customer details to authenticate, and click Submit.
-
Go to the Account tab and click Edit displayed on the Auto Renewal field under the Account Details section.
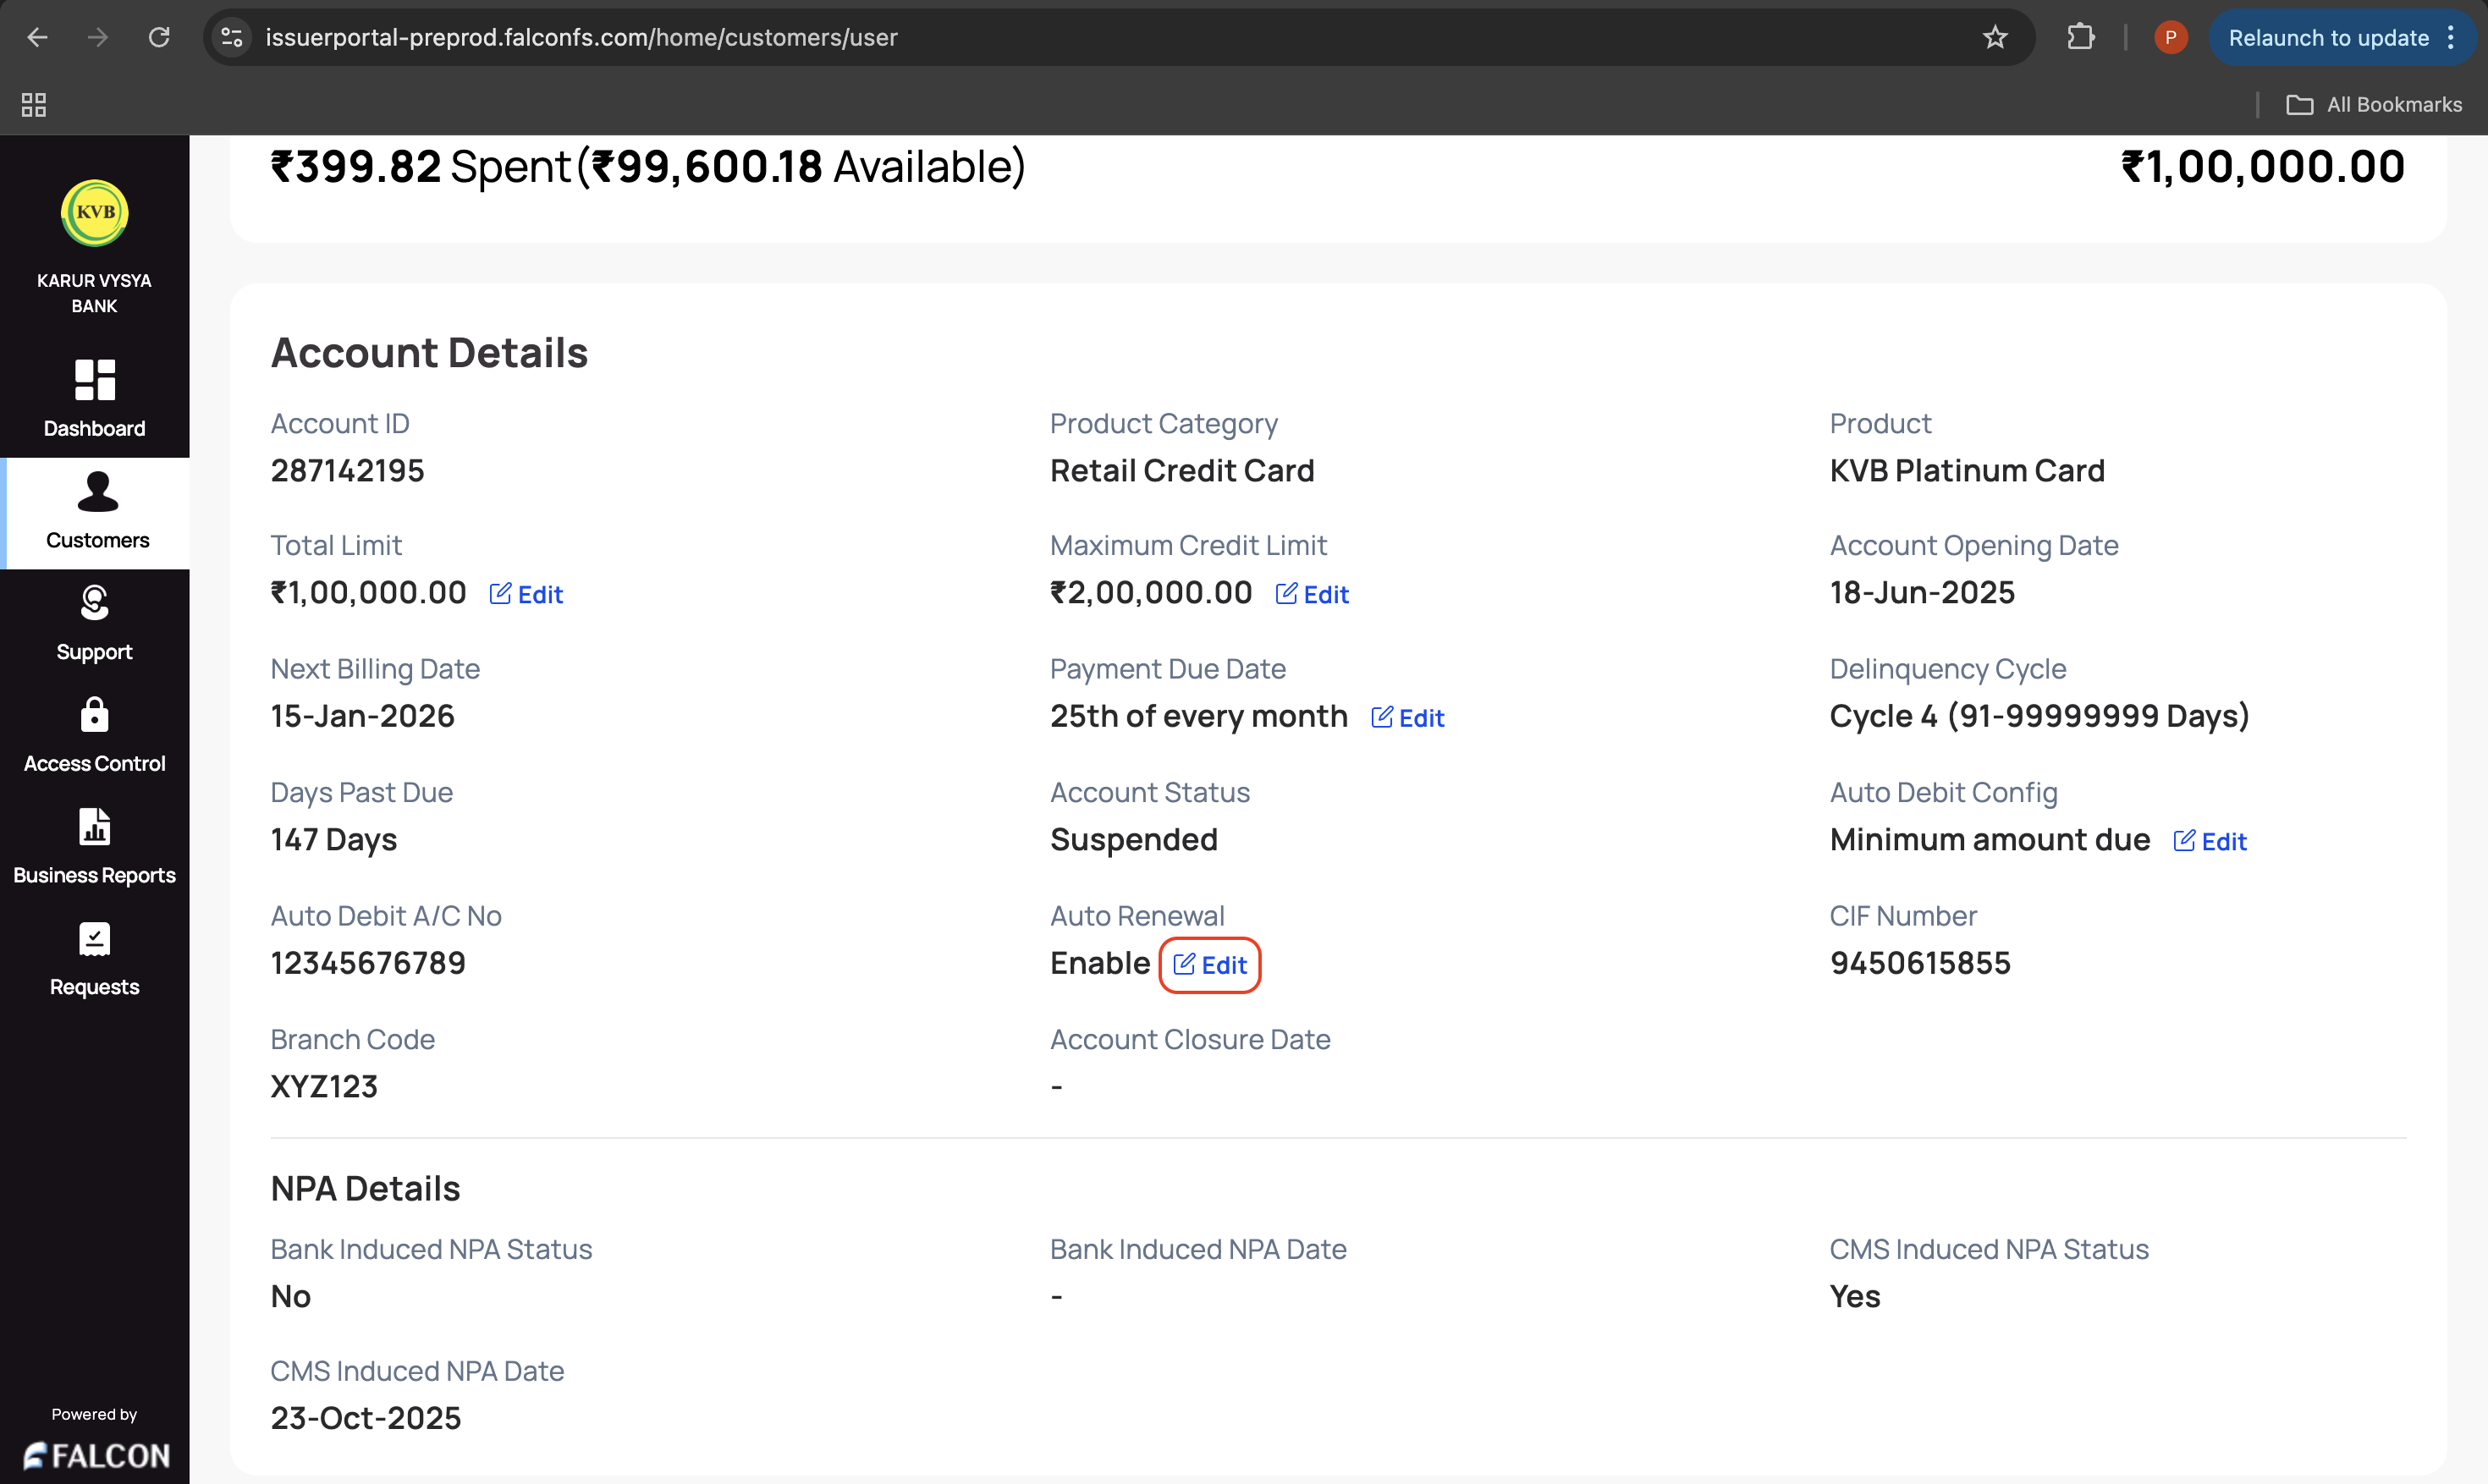
- Provide a comment or a reason to enable/disable auto-renewal in the Enable/Disable Auto Renewal? pop-up page.
- Click Enable or Disable depending on the action you want to perform to submit the request.
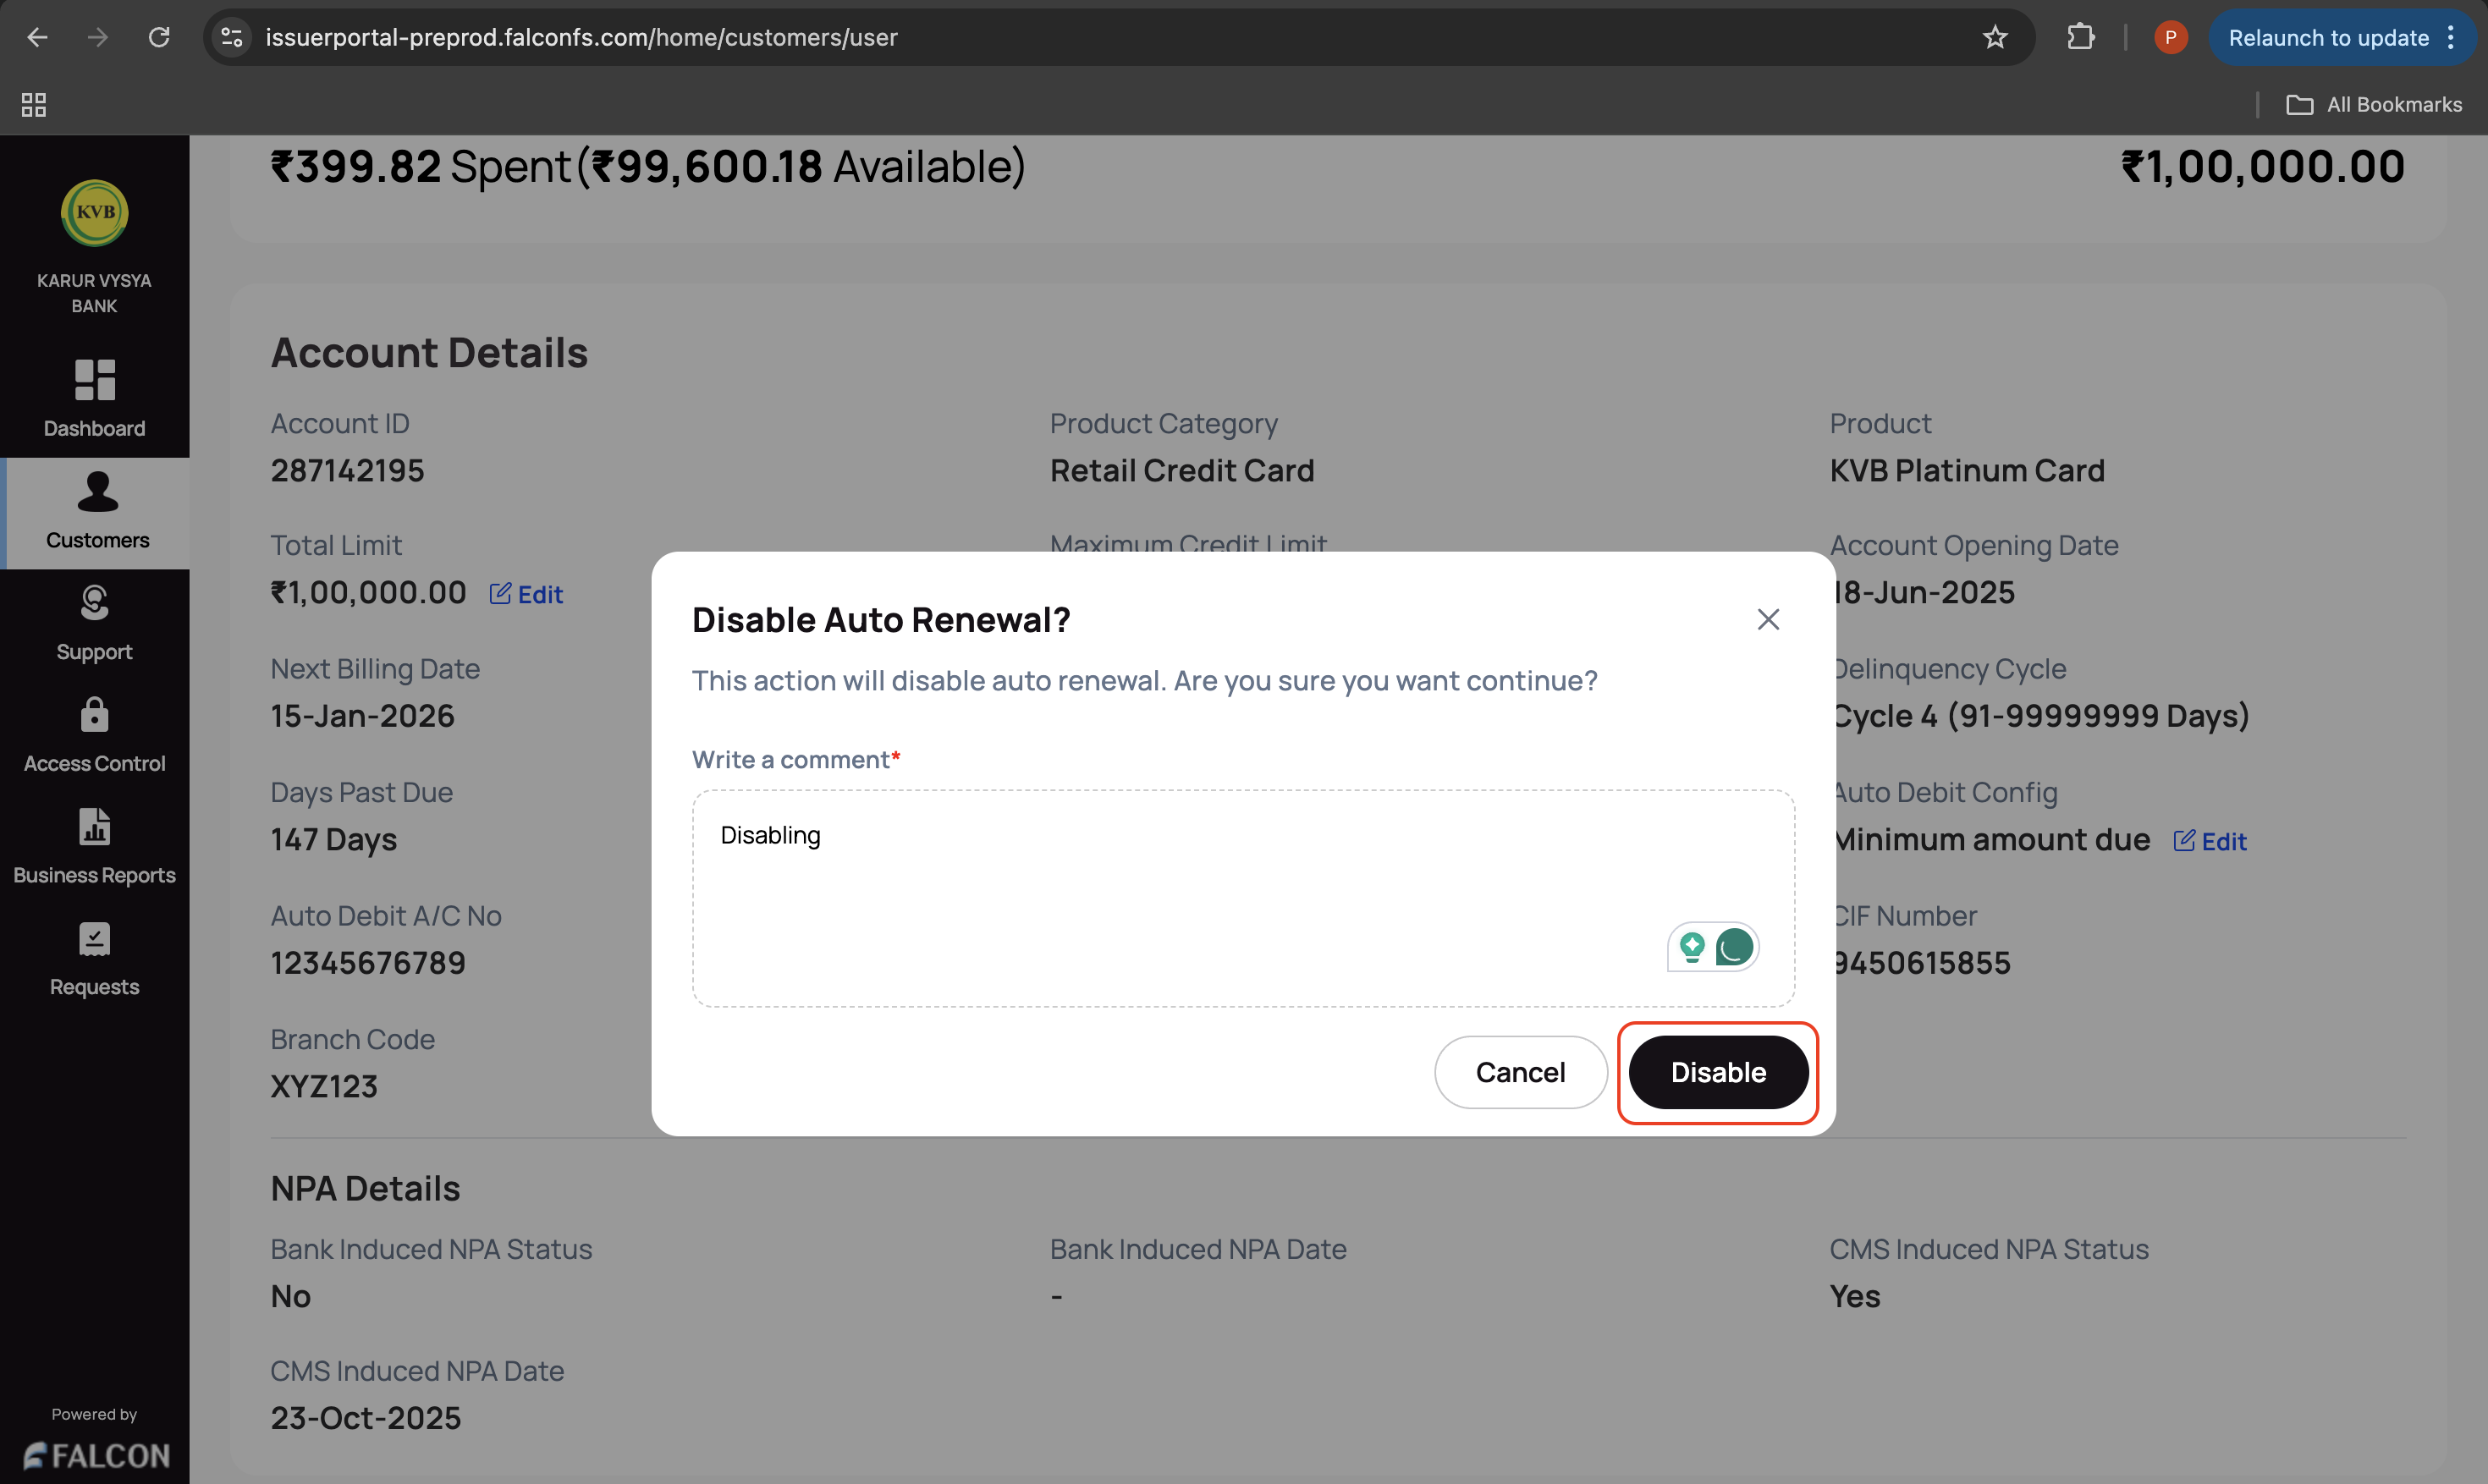
You have successfully raised a request to update auto-renewal. You can check the status of the request in the Requests page.
🔄 Update Auto-debit Configuration
This action is used when a bank wants to update the auto-debit configuration.
To update the auto-debit configuration:
-
Log in to the issuer dashboard using the role-based credentials.
-
If a user is:
- An admin maker: Click the customer to pay the bill.
- A support maker: Click the customer, select any two customer details to authenticate, and click Submit.
-
Go to the Account tab and click Edit displayed in the Auto Debit Config field under the Account Details section.
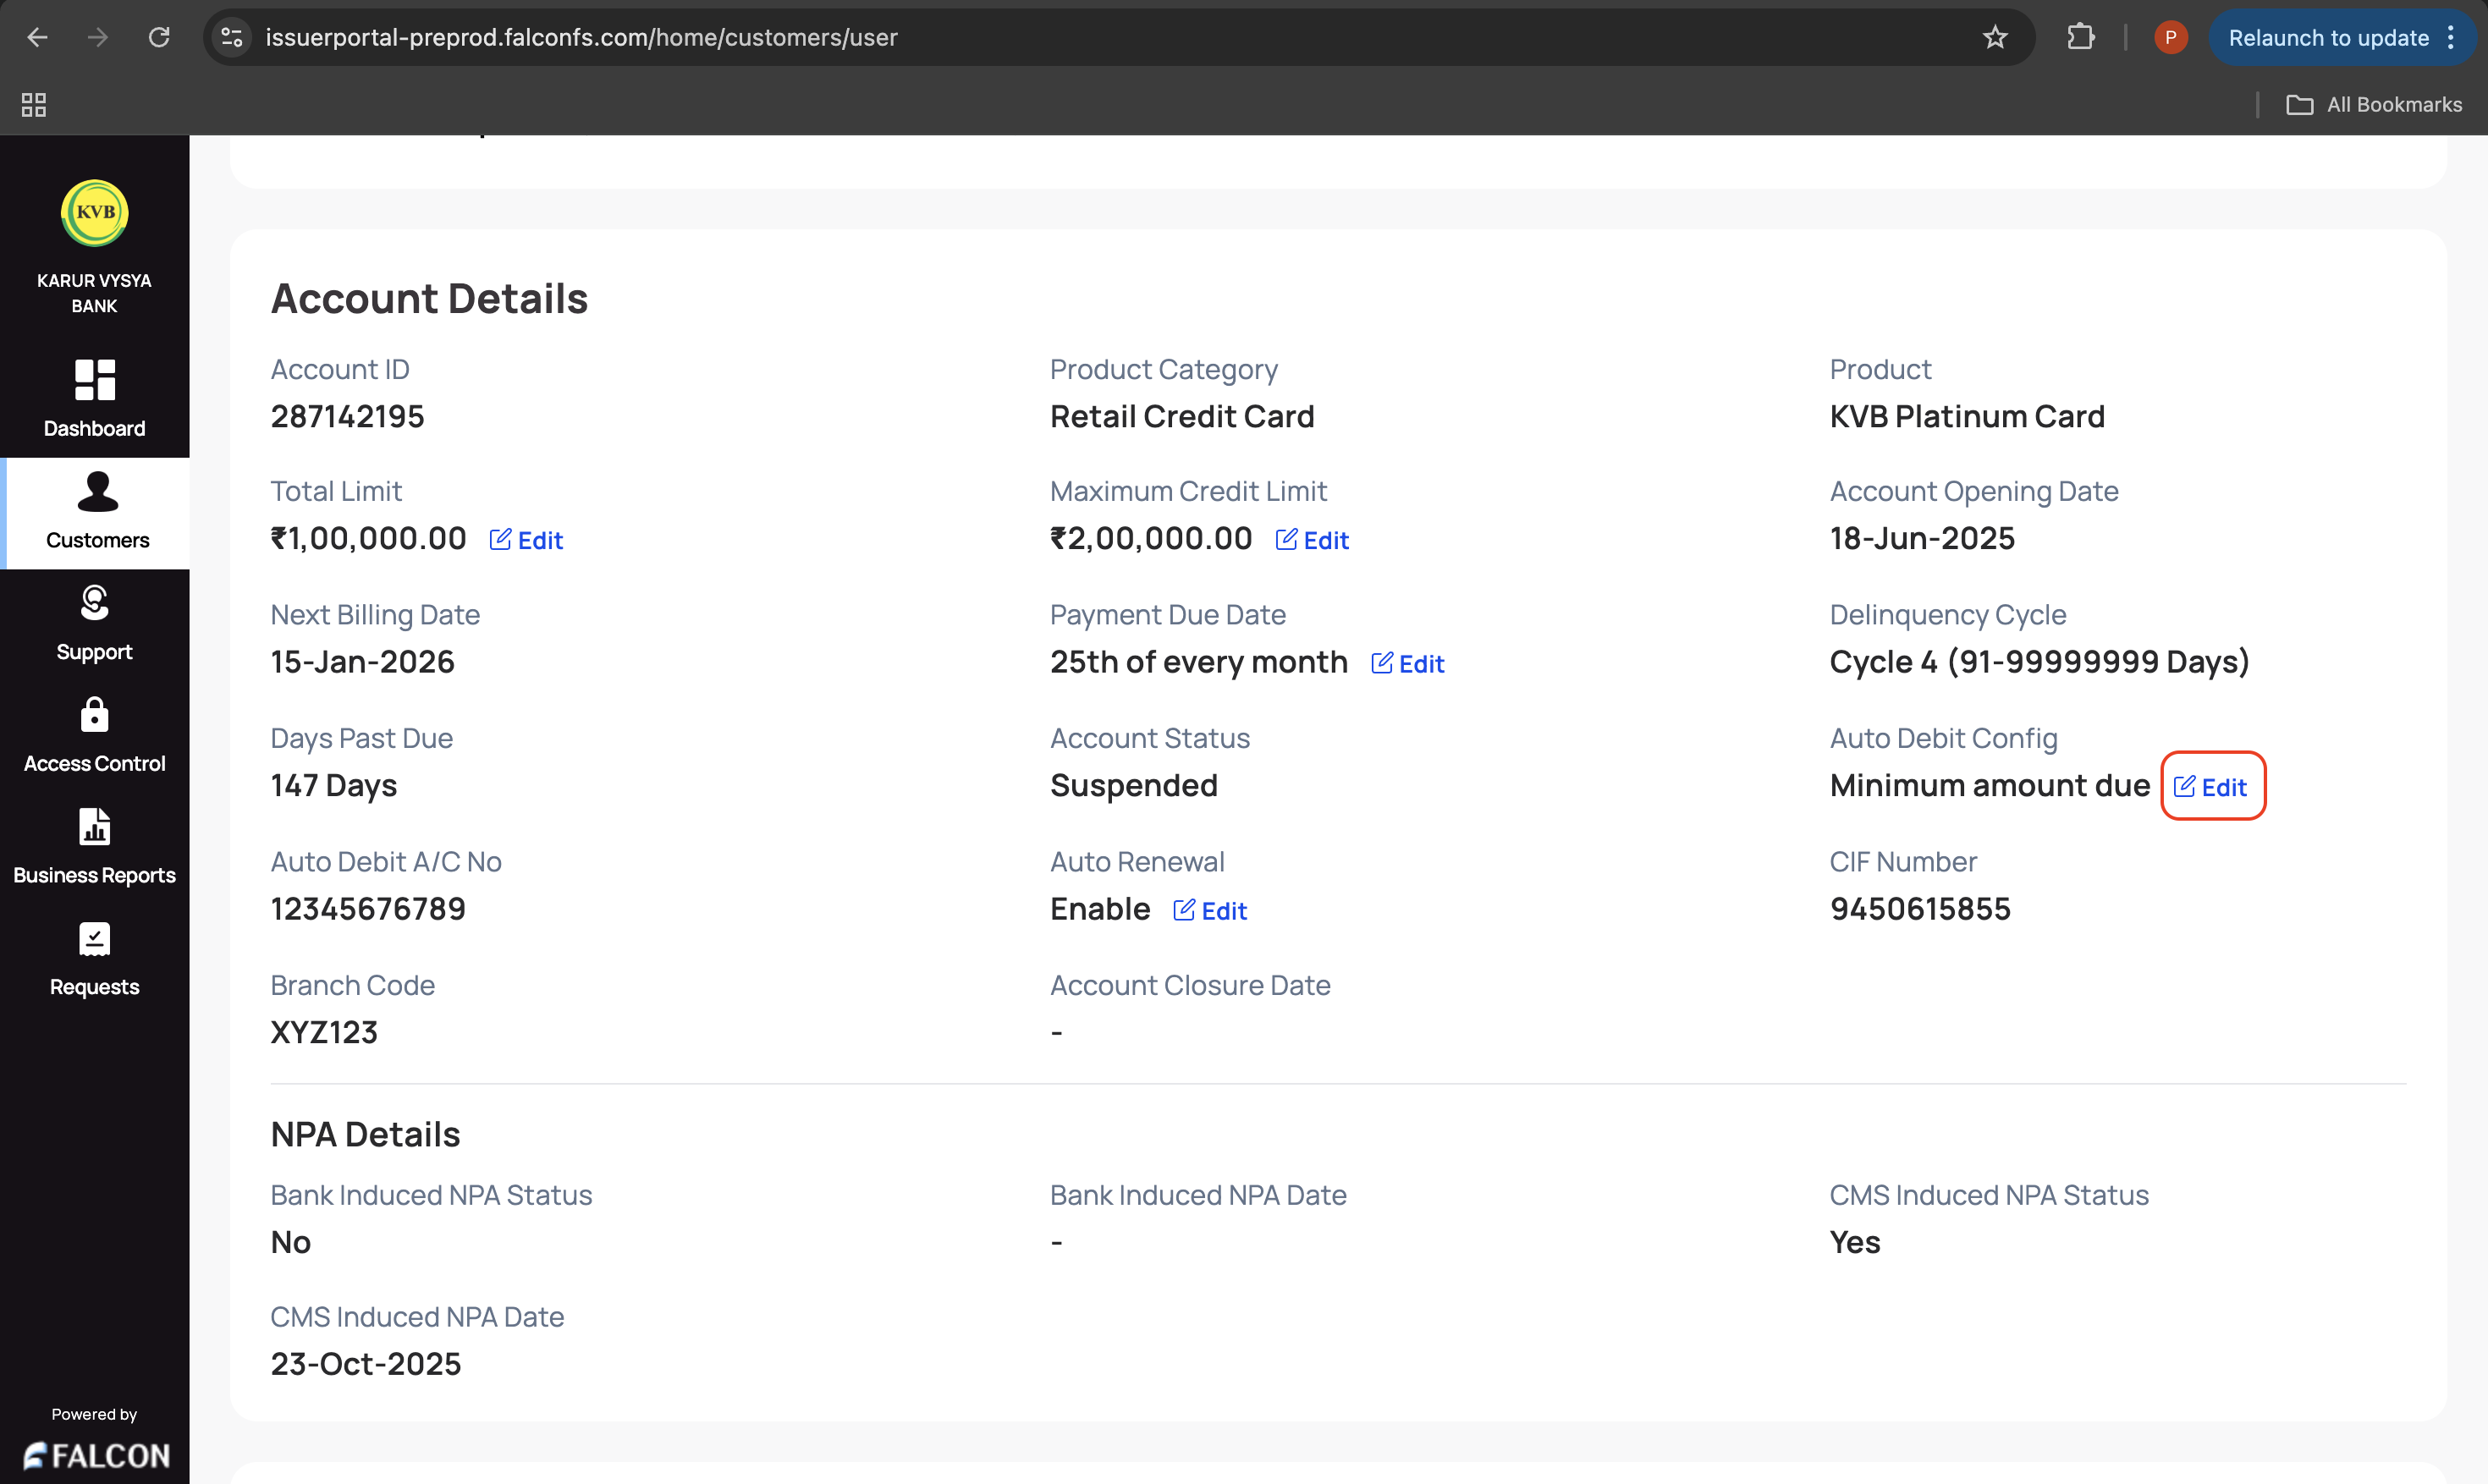
- Provide the following details on the Update Auto Debit Config pop-up page.
- Select the required checkbox depending on whether to activate/deactivate the auto-debit configuration.
- Select the auto-debit amount type from the Select the auto debit amount drop-down list.
- Select the account from the available list. You can click Update Account Details to add a new account and provide the account number and IFSC.
- Write a comment
- Click Update to submit the request.
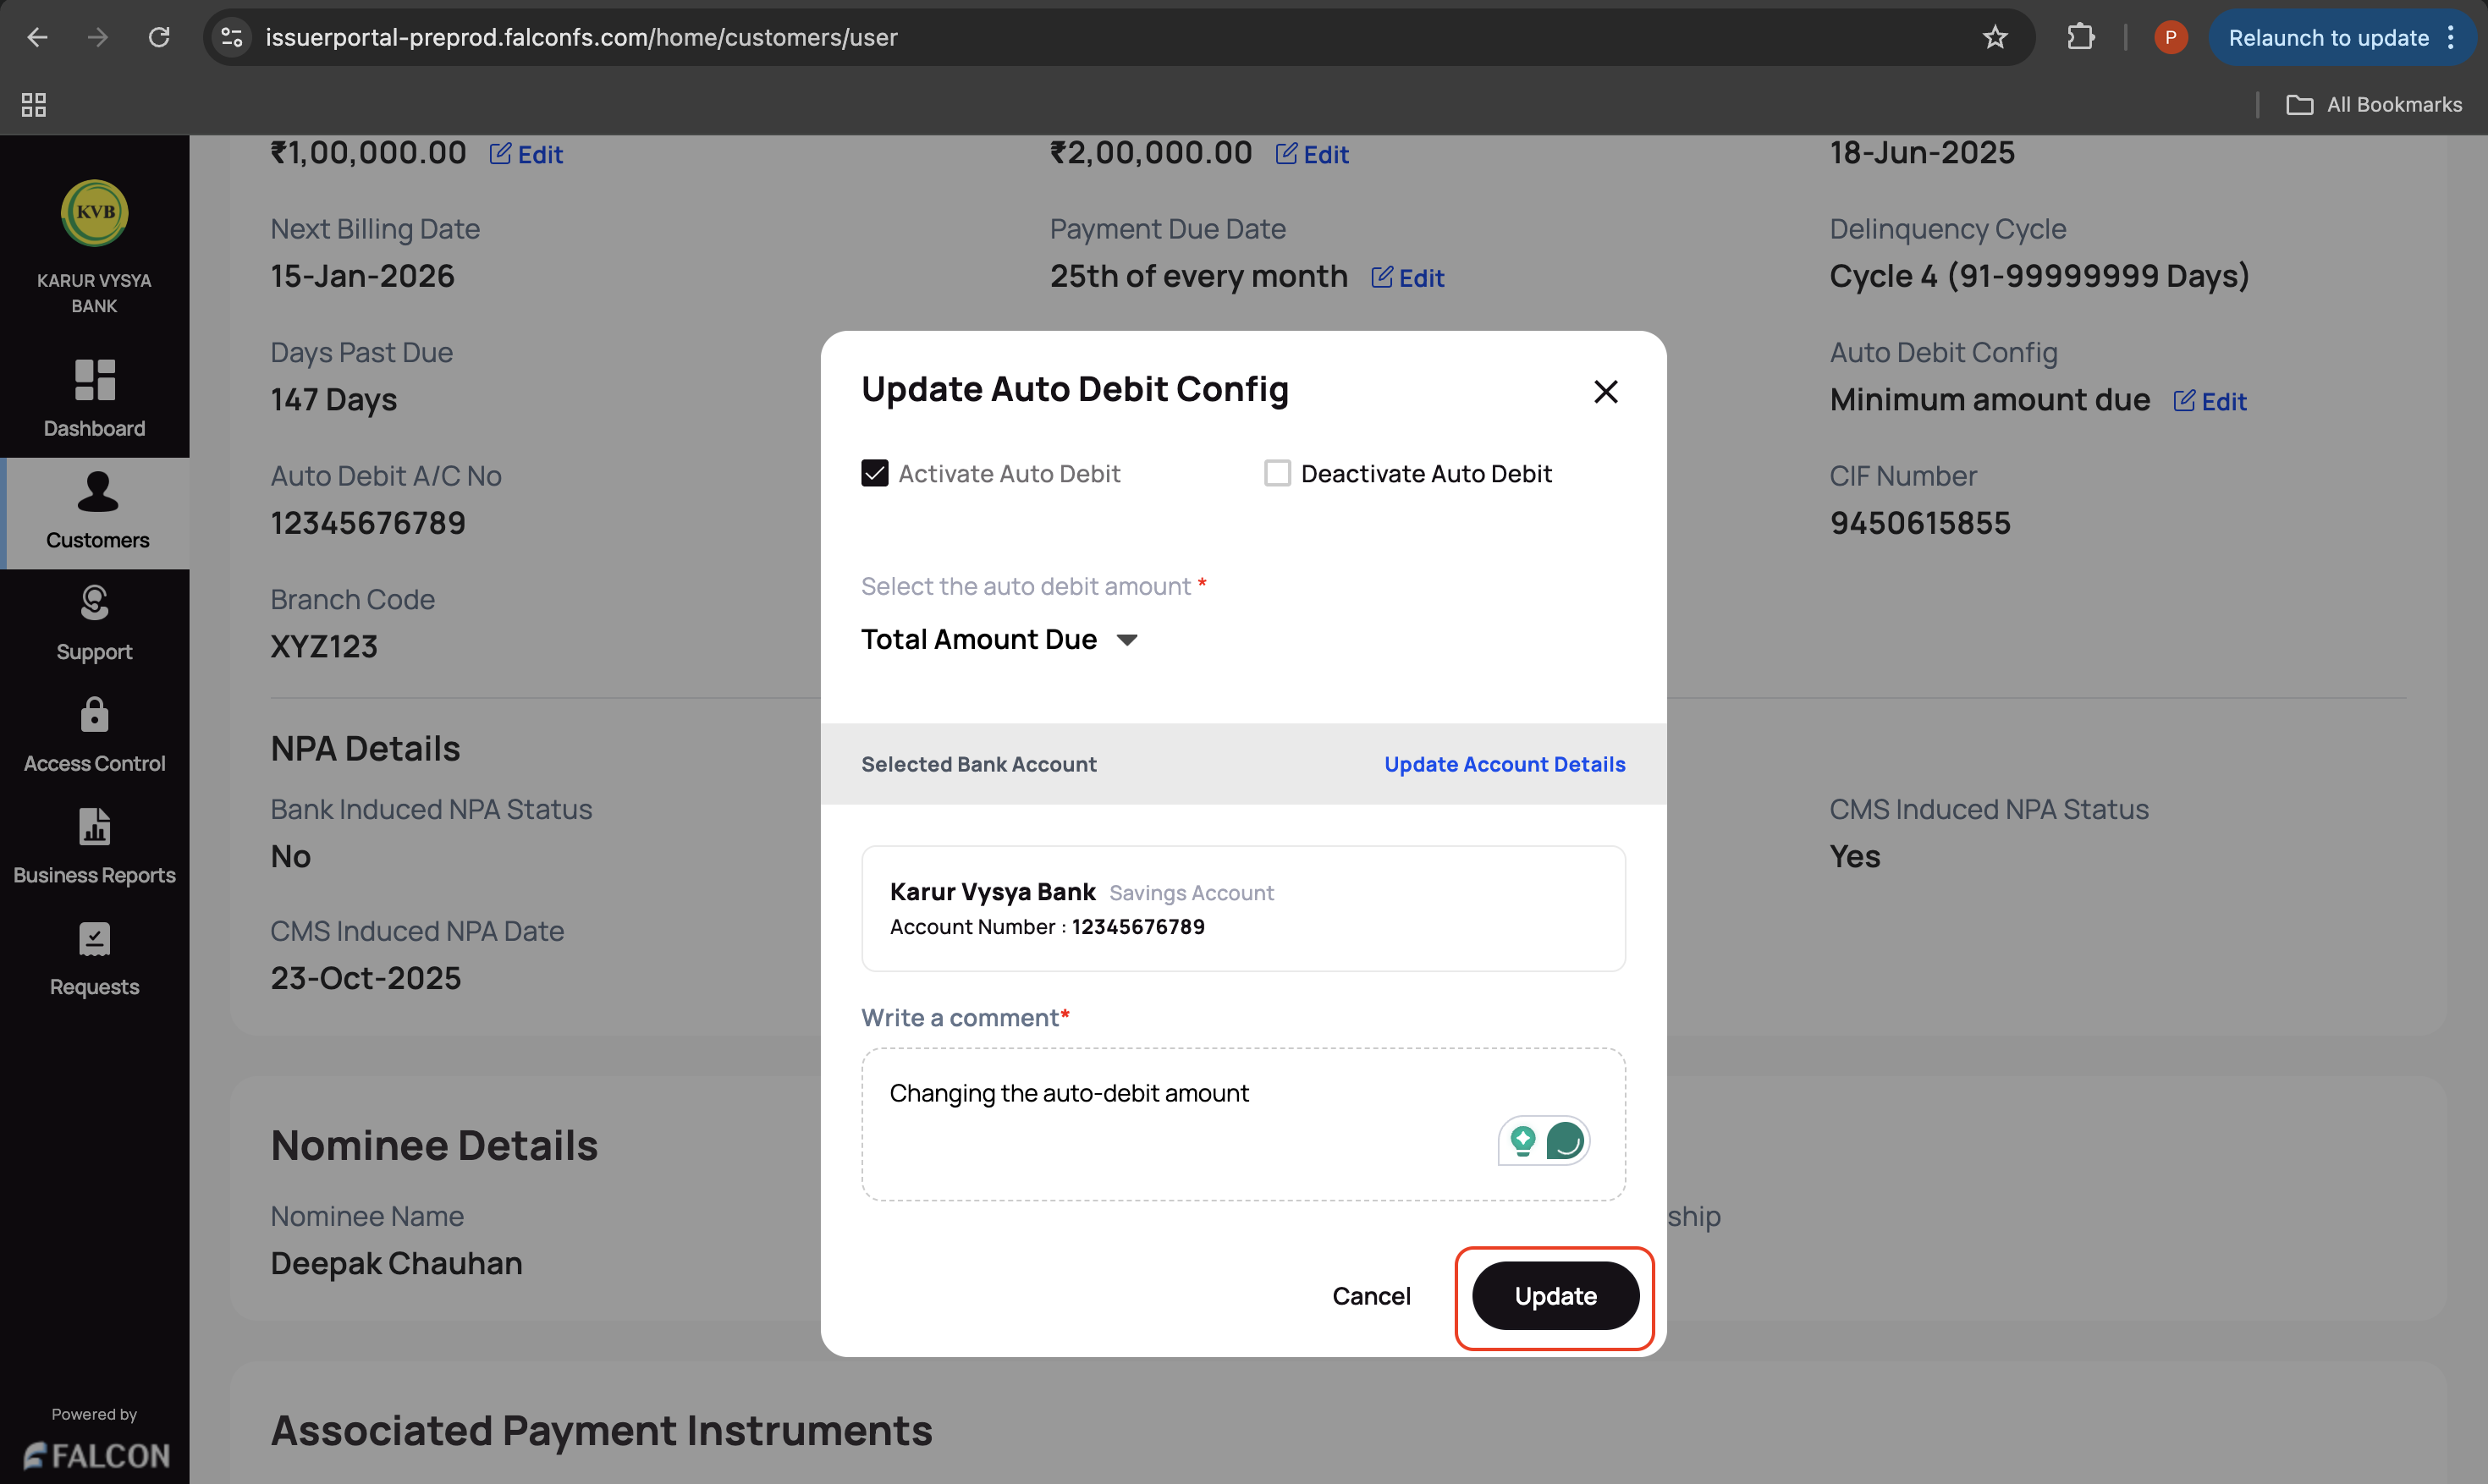
You have successfully raised a request to update the auto-debit configuration. You can check the status of the request in the Requests page.
🔒 Close an Account
This action is used to permanently close a customer’s account once all dues are cleared and the closure process is approved.
Example:
- A customer contacts the bank to close their account.
- The issuer portal user checks whether there are any pending interest or fees for that account.
- The user should post the pending interest or any other fees (if there are any) and inform the customer to pay the same (i.e., account balance + accrued interest and fee, which is at the bottom of the section).
- After the customer pays the remaining dues, the bank can take the request for account closure, and a checker can approve the same.
- Alternatively, the bank may decide to close dormant or risk accounts as part of a compliance review.
The system marks the account as closed and restricts any further transactions or updates.
You can close an account with no outstanding balance.
To close an account:
-
Log in to the issuer dashboard using the role-based credentials.
-
If a user is:
- An admin maker: Click the customer to pay the bill.
- A support maker: Click the customer, select any two customer details to authenticate, and click Submit.
-
Go to the Account tab, click the Manage drop-down displayed in the top-right corner of the Account Overview section, and click Account Closure.
- Provide the following details and click Confirm in the Close Account pop-up page.
- Select the account closure reason from the drop-down list
- Write a comment. This is a mandatory field.
You have successfully raised the account closure request. You can check the status of the request in the Requests page.